Rules to Better Exchange Server - 3 Rules
Optimize your Exchange Server experience with essential rules focused on enhancing functionality and security. This collection provides guidance on enabling search features, customizing Outlook Web Access (OWA), and implementing secure HTTP redirection.
If search is not enabled you will get this message in OWA:
"Search results may take a long time to appear because Microsoft Exchange Search is unavailable. Results will not include matches in the email body."
This is how you fix it:
To diagnose Exchange Search issues
-
Is the MSExchangeSearch service started on the Mailbox server? If Yes, go to Step 2. If No, use the Services MMC snap-in to verify that the MSExchangeSearch service is running:
- Click Start, and then click Control Panel
- In Control Panel, double-click Administrative Tools
- In Administrative Tools, double-click Services
- Verify that the Microsoft Exchange Search Indexer service is started
- Is the IndexEnabled parameter configure to true for the mailbox database of the user? Run the following command in the Exchange Management Shell to verify that the IndexEnabled flag is configure to true: Get-MailboxDatabase |ft Name,IndexEnabled
- Run the Test-ExchangeSearch command for the user: Test-ExchangeSearch -Identity username[at]ssw.com.au
- Check Event Viewer for search-related error messages. Check the Source: MSExchangeSearch Indexer and msftesql-Exchange events. For more information, follow the link on the event log
To Rebuild the Full-Text Index Catalog Using the ResetSearchIndex.ps1 Script
- Start the Exchange Management Shell.
- ResetSearchIndex.ps1 -force -all
Wait a couple of minutes to the index be created - Run the command to verify if the index was created
GetSearchIndexForDatabase -All
-
It is possible to customise OWA, for example you can add change the colouring and add your company logo to the OWA logon page.
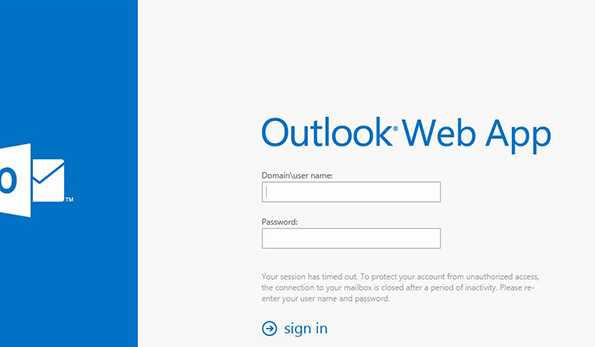
Figure: Bad example - OWA logon page doesn't clearly show it's from SSW 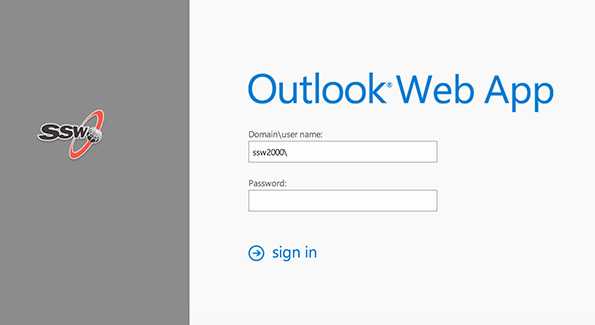
Figure: Good example - SSW OWA logon page with custom logo The following Microsoft article explains how to customise OWA: Customize the Outlook Web App Sign-In, Language Selection, and Error Pages.
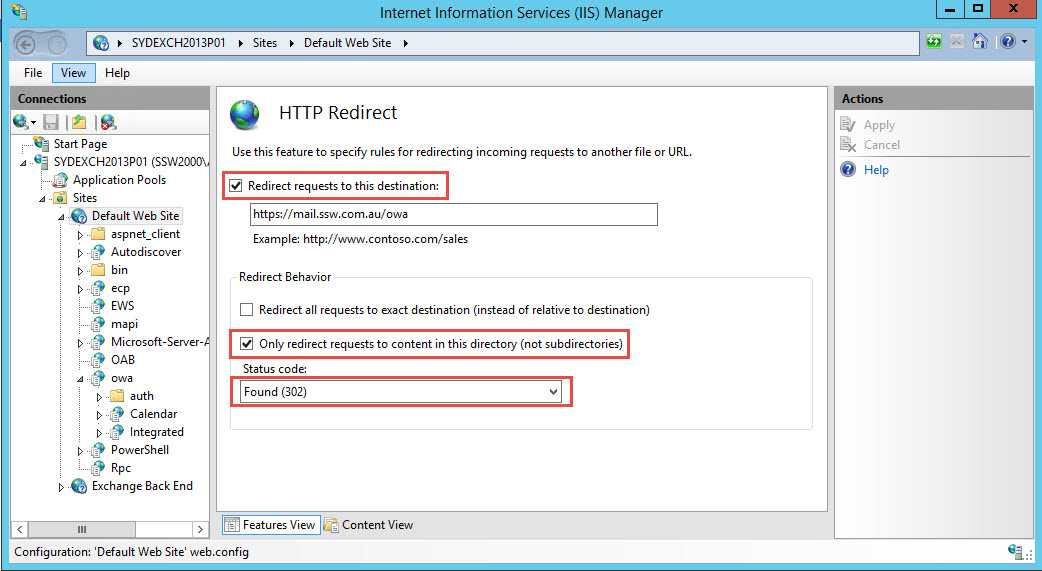
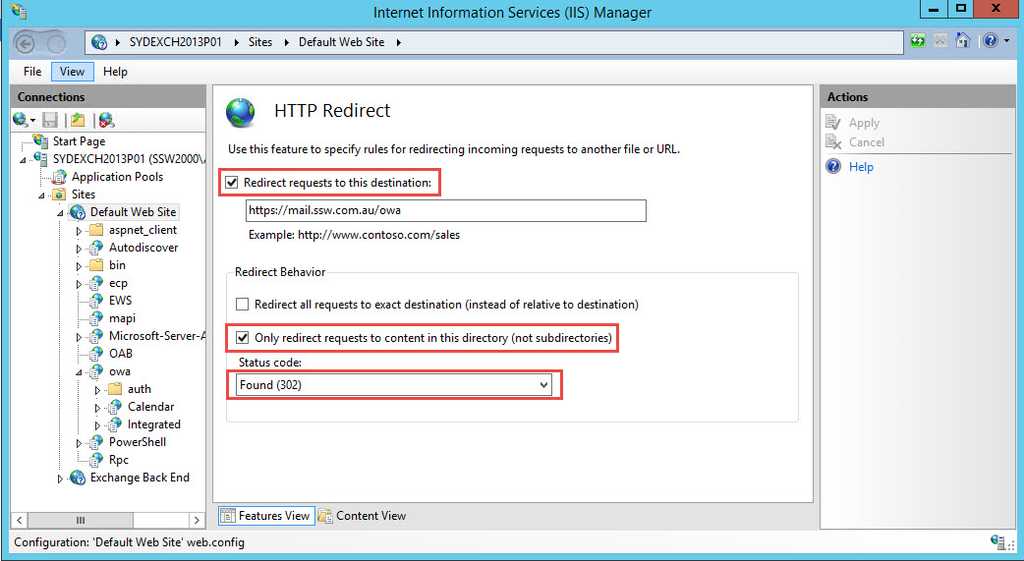
To simplify Outlook Web App (OWA) access for your users, you want to configure the Outlook Web App page to automatically redirect users to https. The HTTP redirect procedure in IIS Manager simplifies OWA URL and forces to SSL connection from mail.domain.com to mail.domain.com/owa .
Step 1: Use IIS Manager to simplify OWA URL and force redirection to SSL
- Start IIS Manager
- Expand the local computer, expand Sites, and then click Default website
- At the bottom of the Default website Home pane, click Features View if this option isn't already selected
- In the IIS section, double-click HTTP Redirect
- Select the Redirect requests to this destination check box
- Type the absolute path of the /owa virtual directory. For example, type mail.domain.com/owa
- Under Redirect Behavior , select the Only redirect requests to content in this directory (not subdirectories) check box
- In the Status code list, click Found (302)
- In the Actions pane, click Apply
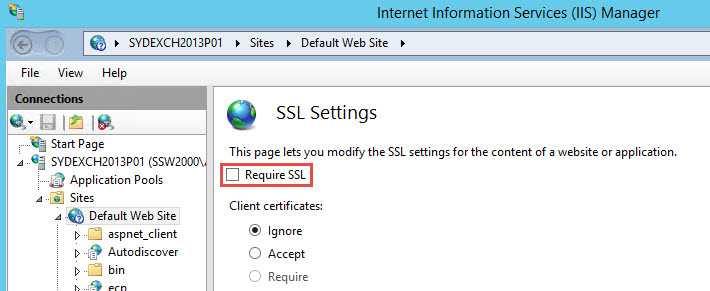
- Click Default website
- In the Default website Home pane, double-click SSL Settings
- In SSL Settings, clear Require SSL
Step 2: Remove redirection from virtual directories
- Open a Command Prompt window.
- Navigate to:
<window directory="">\System32\Inetsrv.- Run the following commands:
appcmd set config "Default Web Site/autodiscover" /section:httpredirect /enabled:false -commit:apphost appcmd set config "Default Web Site/ecp" /section:httpredirect /enabled:false -commit:apphost appcmd set config "Default Web Site/ews" /section:httpredirect /enabled:false -commit:apphost appcmd set config "Default Web Site/owa" /section:httpredirect /enabled:false -commit:apphost appcmd set config "Default Web Site/oab" /section:httpredirect /enabled:false -commit:apphost appcmd set config "Default Web Site/powershell" /section:httpredirect /enabled:false -commit:apphost appcmd set config "Default Web Site/rpc" /section:httpredirect /enabled:false -commit:apphost appcmd set config "Default Web Site/rpcwithcert" /section:httpredirect /enabled:false -commit:apphost appcmd set config "Default Web Site/Microsoft-Server-ActiveSync" /section:httpredirect /enabled:false -commit:apphost- Finish by running the command:
iisreset/noforce.Step 3: Test that HTTP to HTTPS redirect is working
- Open Internet Explorer and type in mail.domain.com
- Done - You are then redirected to mail.domain.com/owa

Figure: Bad example - No redirect in place for OWA 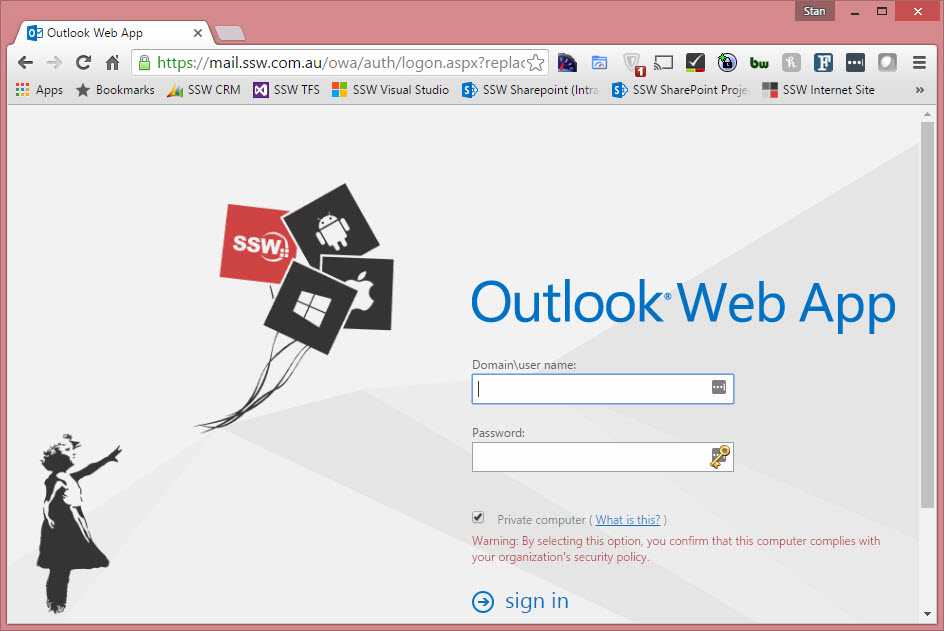
Figure: Good example - Redirect from HTTP to https for OWA