Explore these essential guidelines designed to enhance the management and performance of Windows Servers. Each rule provides insights on optimizing updates, ensuring system uptime, and improving resource allocation for a more efficient server environment.
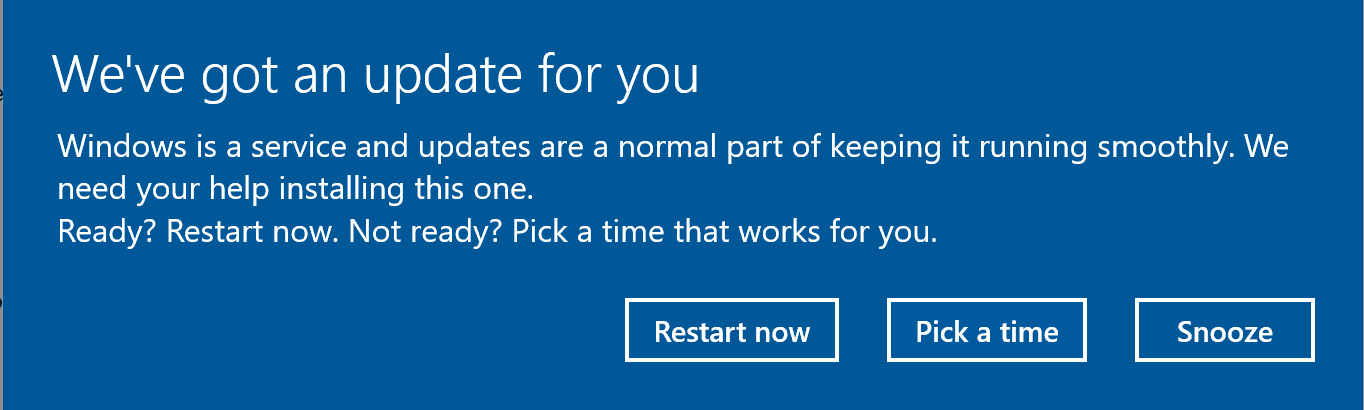
We all know it’s important to keep our servers updated. Unfortunately though, by default, Windows will automatically download and install all new Windows Updates on your servers. This will mean the servers will occasionally restart to install updates when you don’t want them too. You will also get annoying popups trying to get you to restart the computer.
Note: This rule is applied to both client PCs and servers.
It is also one more reason developers don’t like to join a company domain on their personal laptops!
Figure: Bad example - Windows 10 shows a ‘Restart now’ – do not accidentally press it! Your production server and your users won't be happy!
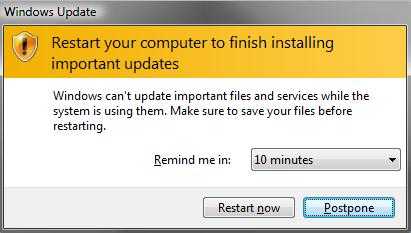
Figure: Bad example – Remember this nasty one from Vista days?
Note: Server patching is also achievable via SCCM and you get more control over restarting windows like this. WSUS can also be used in conjunction with group policies to handle restart times better.
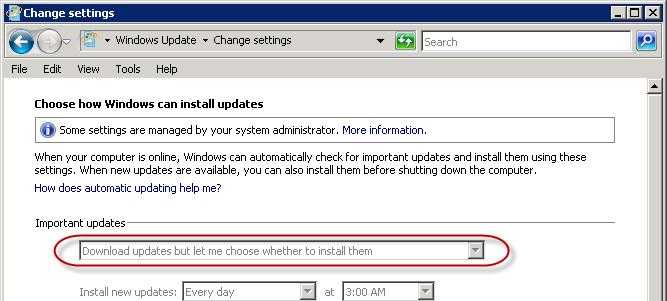
The best ensure you are still downloading updates but not installing them automatically is to use Group Policy.
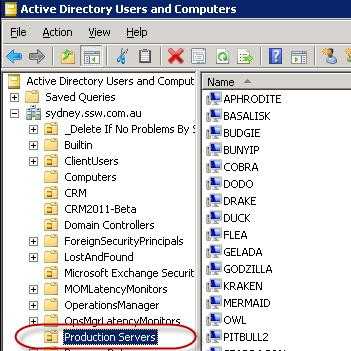
Create an Organization Unit (OU) in Active Directory, and put all your Production Servers in the OU
Add all your Production Servers to the Production Server OU
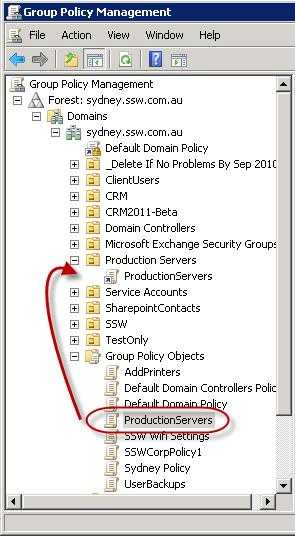
Create a new Group Policy object and link it to the Production Server OU
Create a new Group Policy for your Production Servers
Edit the new Group Policy object and drill down to Computer Configuration | Policies | Windows Components | Windows Update
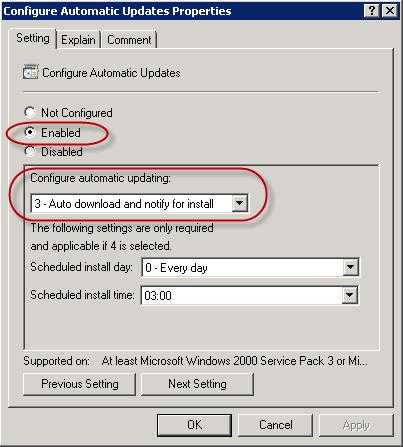
Edit Configure Automatic Update Properties item and enable it
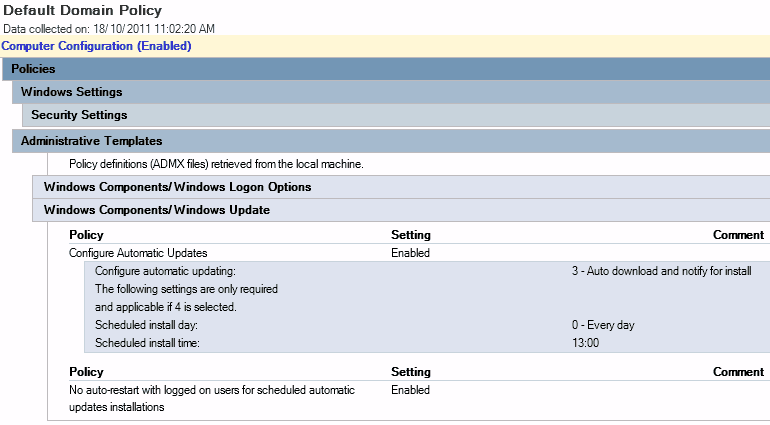
Set Configure Automatic Updating option to 3 – Auto download and notify for install
Edit Configure Automatic Updates Properties and enable 'Auto download and notify for install
After the new Group Policy propagates, you will notice the update setting is now locked on the servers in the Production Server OU.
Figure: Good example - The Group Policy locks the Windows Update setting
From now on your servers will be updated without unplanned reboots!
Figure: Good example - AD shows the Group Policy setting “3 – Auto download and notify for install”. This policy is applied to the specified OU eg. Production Servers joined to this domain
Check out "auto-update" rules for PCs and Servers.
We all know it’s important to keep our servers updated. Unfortunately though, by default, Windows will automatically download and install all new Windows Updates on your servers. This will mean the servers will occasionally restart to install updates when you don’t want them too. You will also get annoying popups trying to get you to restart the computer.
After a new Service Pack is released for a product (for example, Exchange 2010 Service Pack 1), users and management can get very excited about new features that the Service Pack will bring that will help them out, or fix problems that they had been having with the product.
Microsoft generally test their Service Packs very well, but things can go wrong.
As a general rule, we wait 4 weeks before installing a new Service Pack, and tell everyone to hold their horses.
Figure 1 - Even though managers and users might be pressing you to install a Service Pack - tell them to hold their horses!
After the 4 week period has expired perform the following tasks before installing the Service Pack:
Do an search for any trending problem when updating to the new Service Pack
Check for any known issues in the Microsoft KB with the Service Pack
Read installation documentation
Backup your system, or if you are using Hyper-V, take a snapshot
Reboot before you are about to install a Service Pack
Following this rule should prevent disaster in the event that a Service Pack is troublesome.
After a new Service Pack is released for a product (for example, Exchange 2010 Service Pack 1), users and management can get very excited about new features that the Service Pack will bring that will help them out, or fix problems that they had been having with the product.
Microsoft generally test their Service Packs very well, but things can go wrong.
As a general rule, we wait 4 weeks before installing a new Service Pack, and tell everyone to hold their horses.
Downtime occurs when you have a single server setup.
TODO: This is 2008 R2 – update to 2016Note: 2008 R2 was not as reliable as later versions. So it would be better to use failover cluster in Server 2012 R2 or 2016 for a more reliable infrastructure configuration.
Use NLB to allow load balancing and failover. On each of your Windows Servers, you will host your website.
You need to follow these steps to get it up and running:
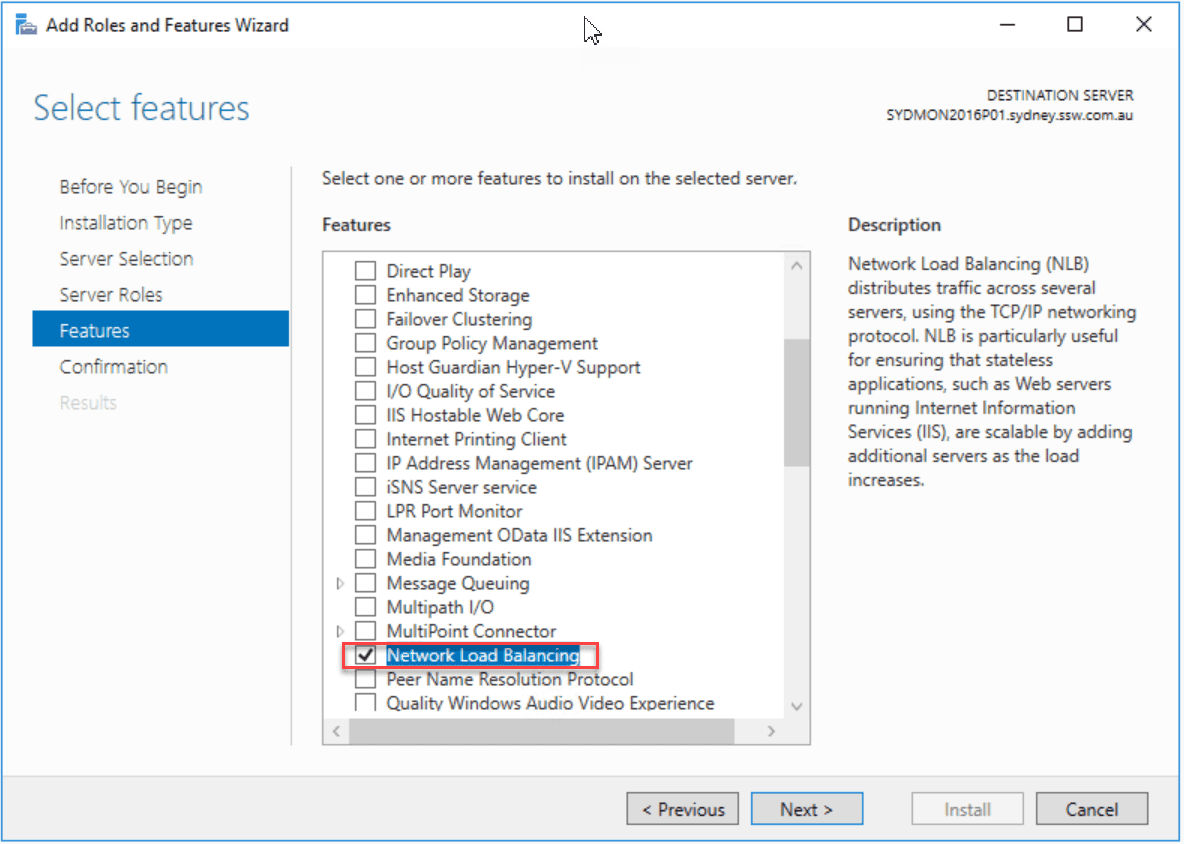
On all nodes of the NBL cluster, the Network Load Balancing Feature needs to be installed.
Setup NLBFigure: Install the NLB Feature
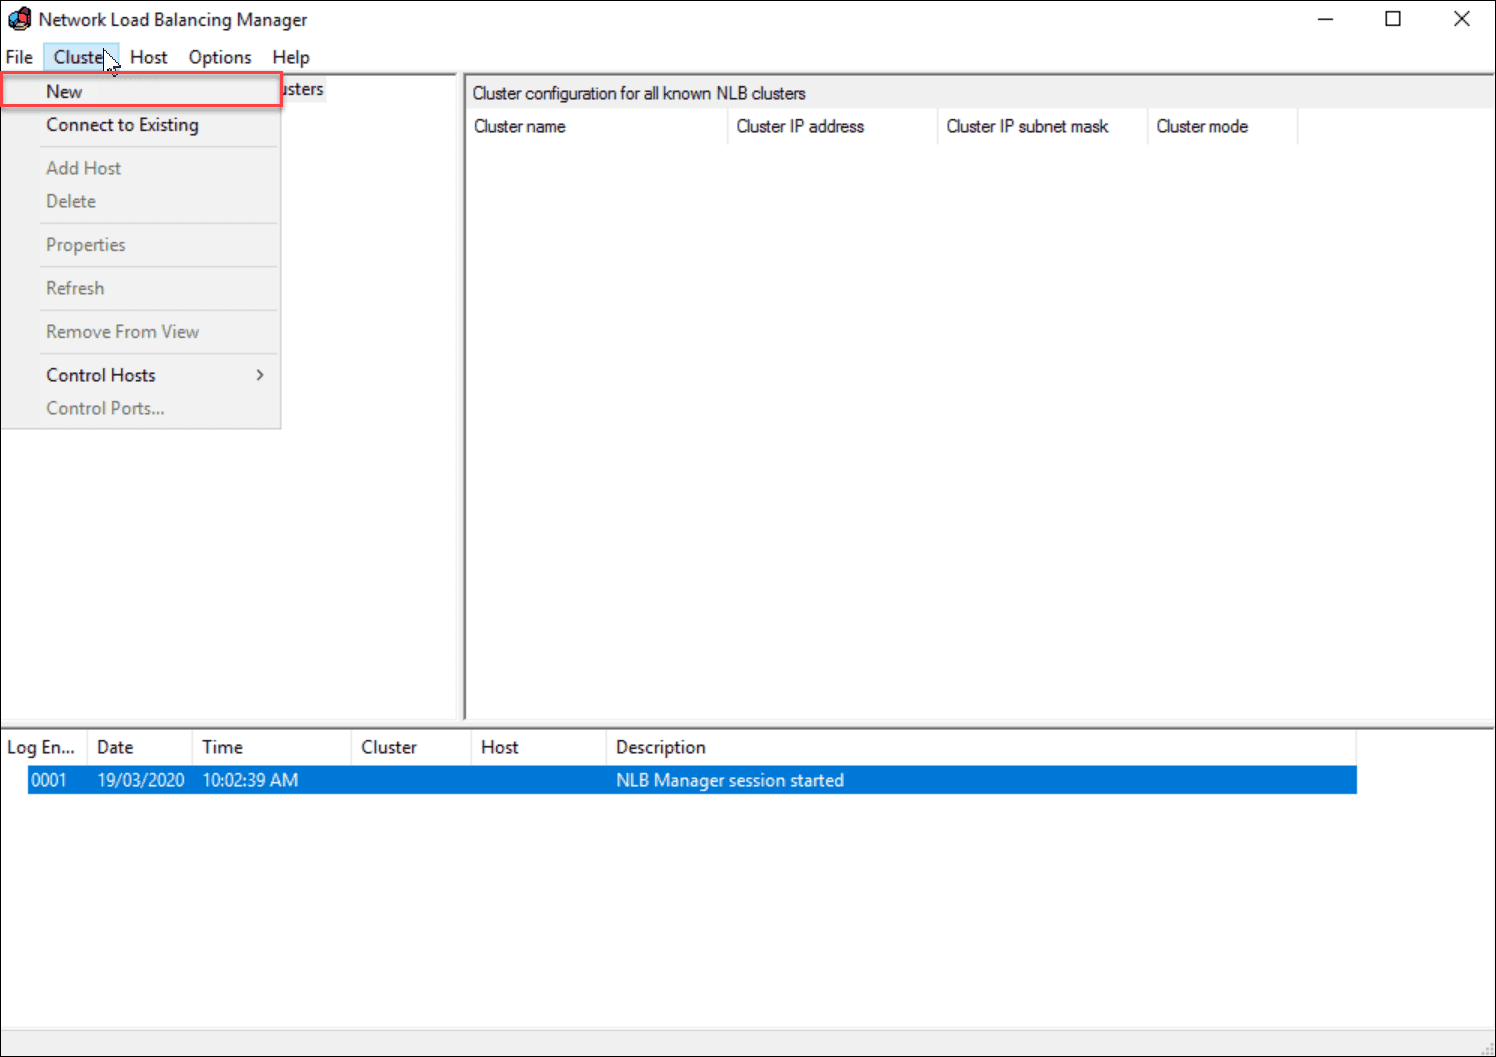
Open the Network Load Balancing Manager from Administrative Tools
Setup NLBFigure: Under the Cluster menu item, click New
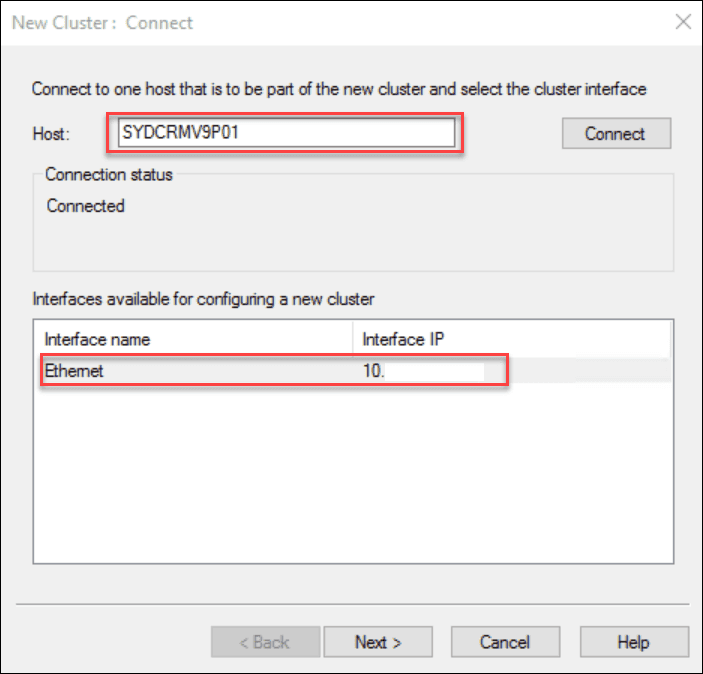
Enter the first node in the cluster in ‘Host’ and press ‘Connect’
Setup NLBFigure: Select the interface for the node
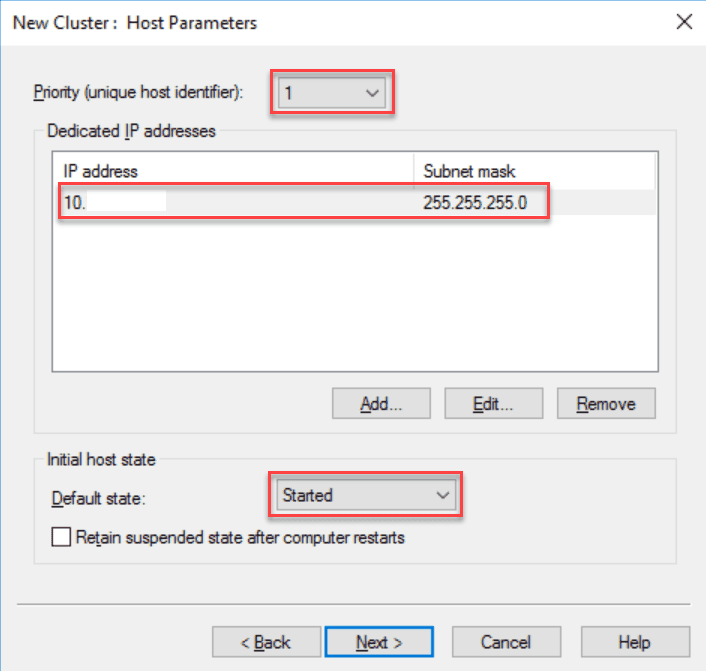
Enter a Priority as 1 (this is just a host identifier)
Setup NLBFigure: In 'Priority' enter '1'
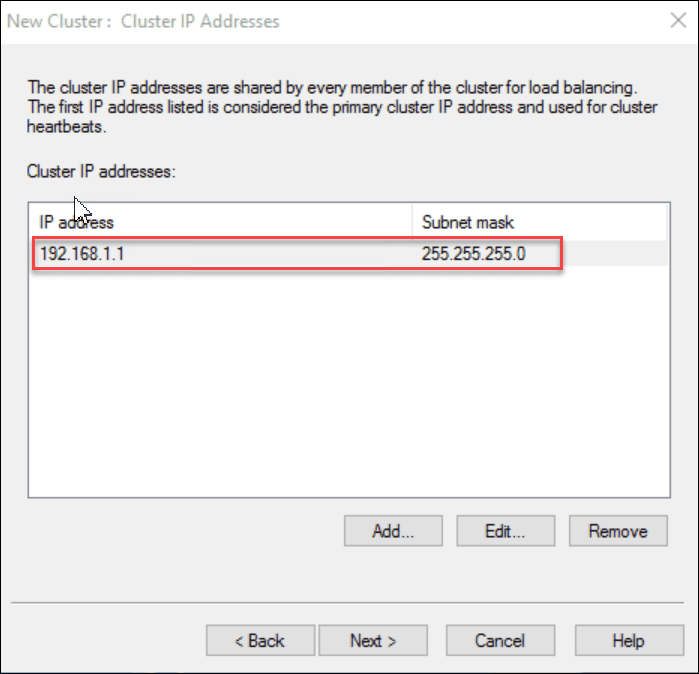
Setup NLBFigure: Enter a virtual IP address for the cluster. eg. 192.168.1.12
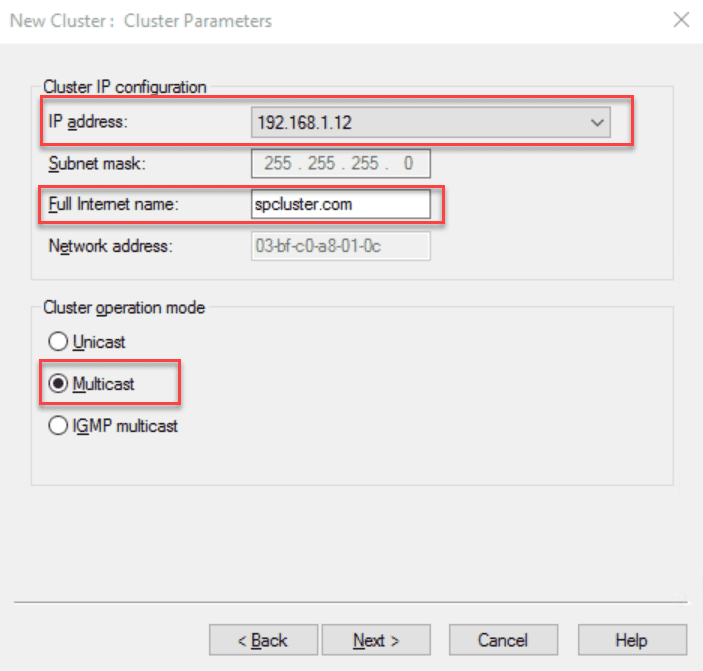
Choose the IP address of your cluster from the dropdown list Set a Full Internet Name eg. spcluster.sydney.ssw.com.au.
Ensure the Multicast Cluster operation mode is selected.
Setup NLBFigure: Set the 3 cluster parameters
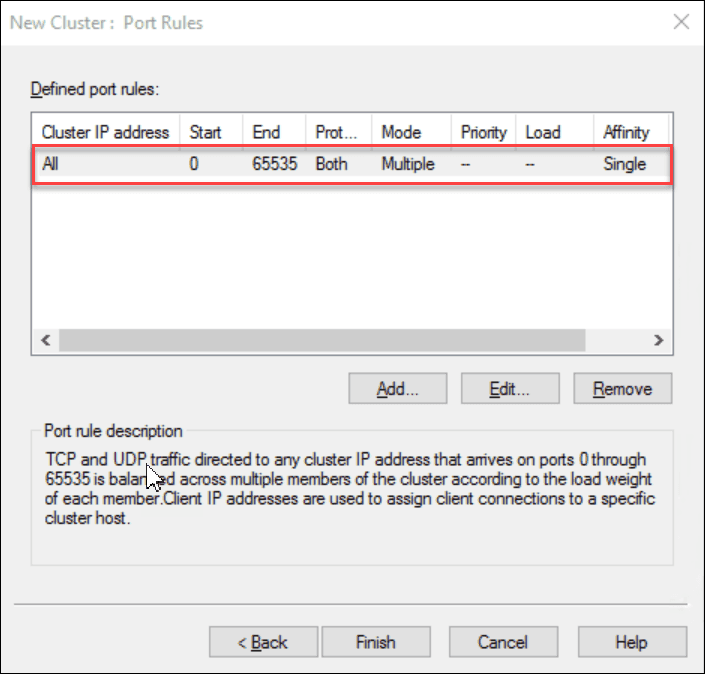
You want sticky sessions so you don’t mistakenly bounce between servers (and lose your state)
Setup NLBFigure: Leave the Port Rule as default. This will provide sticky sessionSetup NLBFigure: Success. The cluster configuration will show a green icon
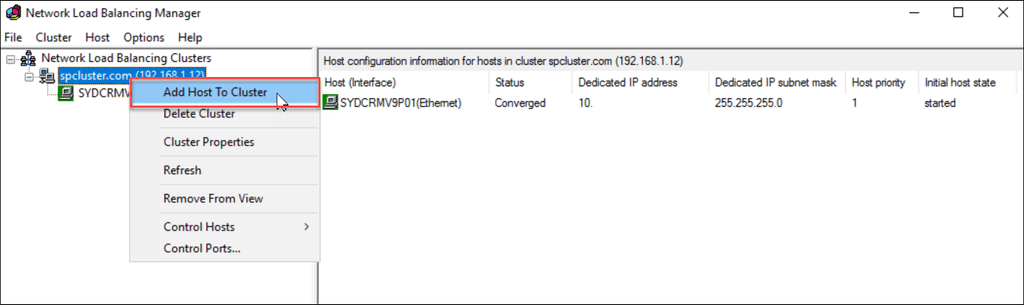
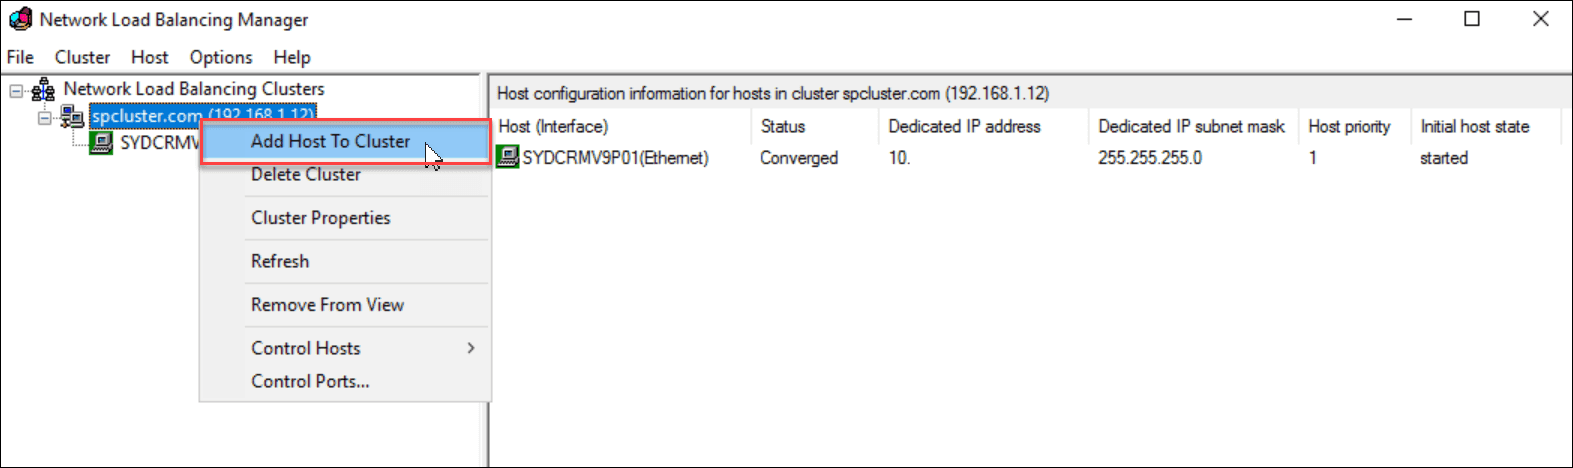
Right click the name of the cluster eg. spcluster.sydney.ssw.com.au Click Add Host To Cluster
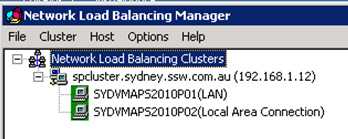
Setup NLBFigure: Add the 2nd web server with a priority of 2
Open a command prompt and type in wlbs query to verify the cluster:
Setup NLBFigure: Type in wlbs query to verify the cluster
Ping both nodes and the virtual IP address externally to verify they are all working
Downtime occurs when you have a single server setup.
TODO: This is 2008 R2 – update to 2016Note: 2008 R2 was not as reliable as later versions. So it would be better to use failover cluster in Server 2012 R2 or 2016 for a more reliable infrastructure configuration.
Use NLB to allow load balancing and failover. On each of your Windows Servers, you will host your website.
You need to follow these steps to get it up and running:
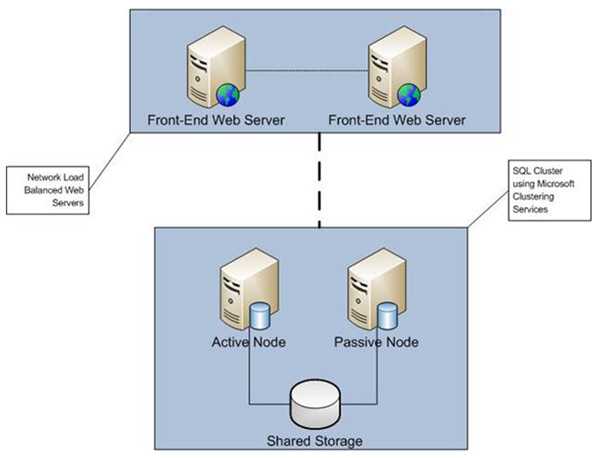
If you are dealing with a single server, there is no way to achieve 100% uptime, when updating or restarting a server.
So set your website up correctly with at least 2 front ends, and 1 backend (the SQL Server).
Server down, site up Figure: Good Example – When one server goes down, the website remains up
Then, use a Network Load Balancer (we recommend Microsoft’s build in NLB) which allows you to spread website load to multiple servers, but even more helpful when you need to do Windows Updates or make changes to web servers in your environment.
Follow the below steps on your test server first, get the application tested passed, then move on to production.
Open the Network Load Balancing Manager
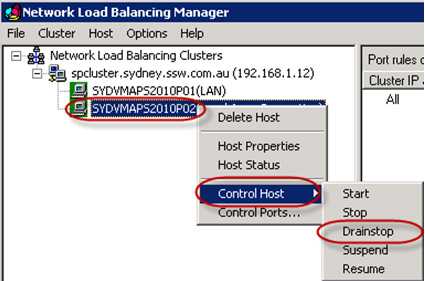
Right click on the machine you want to update | Select Control Host | Click Drain Stopdrain stopFigure: The 2 green icons indicate both servers are live with users - Do a drain stop on the server you want to make changes too
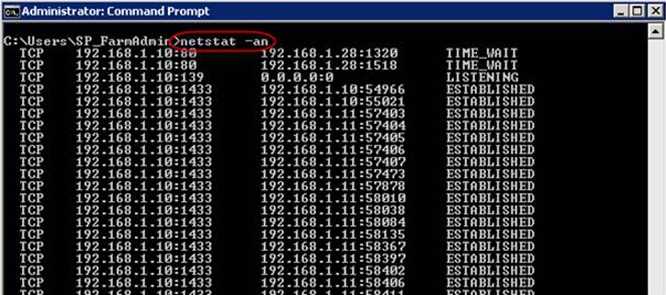
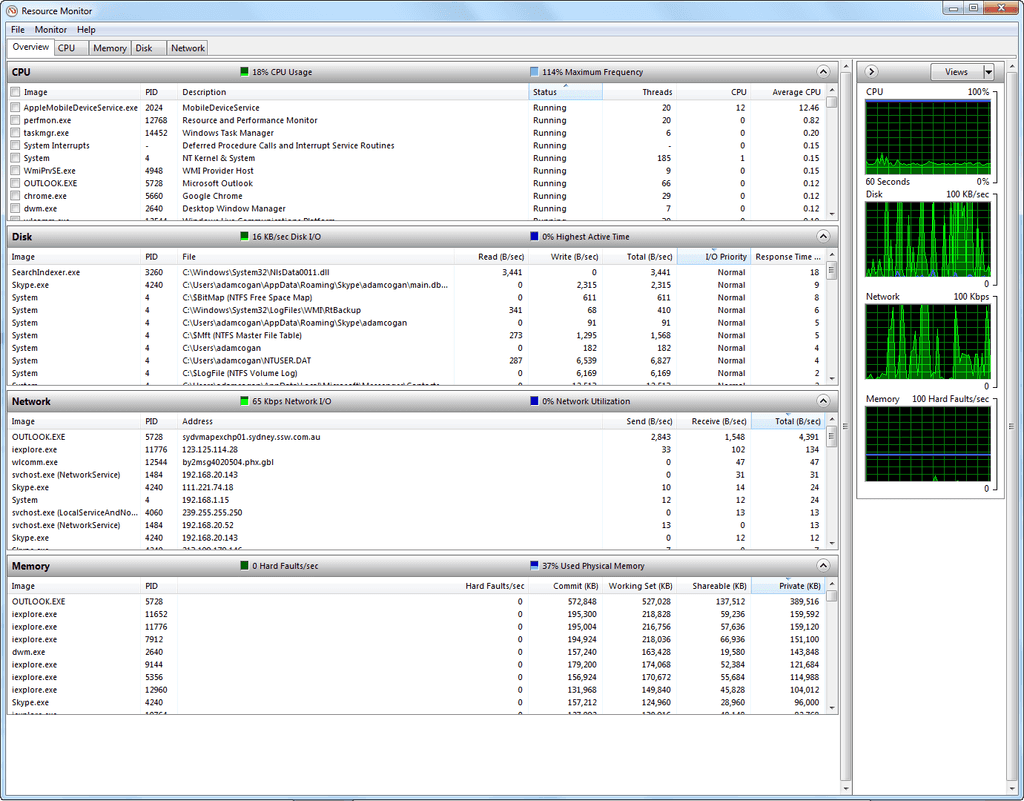
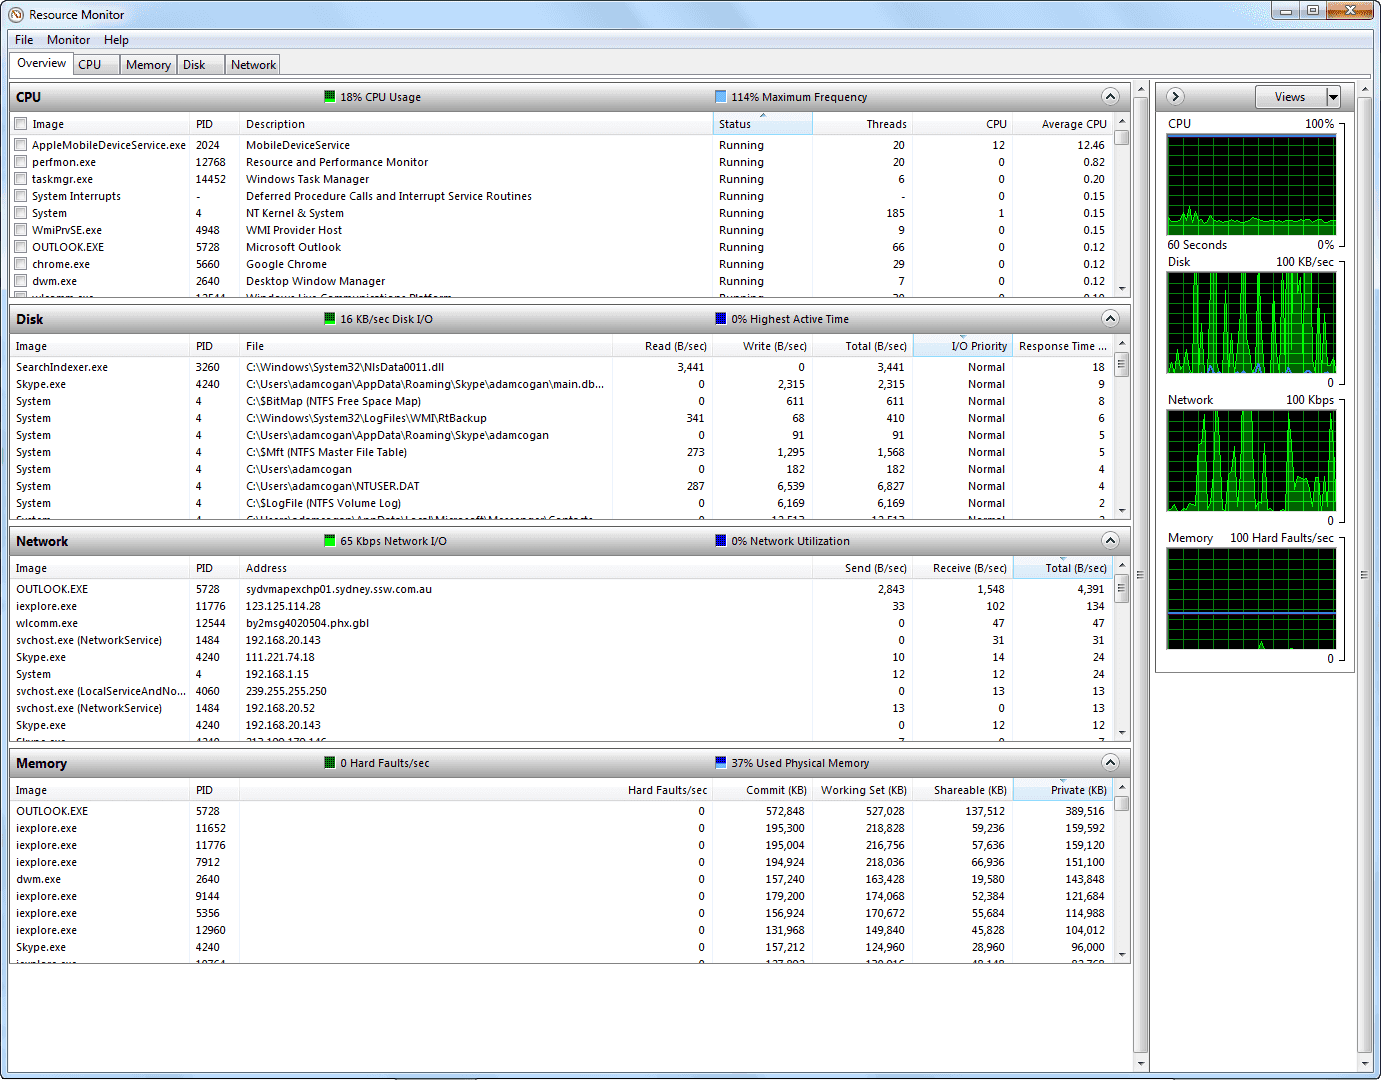
To view the current connections on the server, open a command prompt and enter netstat -an. You will be able to see the connections list dropping as users are sent to the other server netstatFigure: Run "netstat -an" to view the current connections on the server
Allow the NLB to finish sending the connections to the remaining servers. The server you have drain stopped, will turn red when all the users have been moved to the other server
Server turns redFigure: When the server turns red, the connections have been dropped and you're ready to update
Optional – if you are using Hyper-V, take a snapshot of the server you are about to make changes on
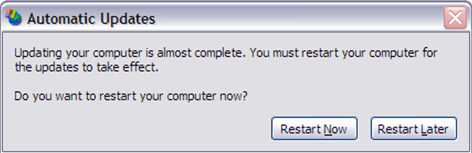
Restart
Windows updateFigure: Now that the server isn't being hit with users, perform your updates. Click "Restart Now"7. Optional – Do a smoke test (open the site and check its working)
Optional – Run any automated tests (for example Telerik Tests)
When the server ready, add it back into the load balancer. Right click on the machine | Select Control Host | Click Start
The server icon will return to green, and users will start being sent to the server again
Server OKFigure: The server will now accept connections again11. Follow the same process for the other server (or multiple)
Congratulations you've just updated your servers with 100% uptime.
If you are dealing with a single server, there is no way to achieve 100% uptime, when updating or restarting a server.
So set your website up correctly with at least 2 front ends, and 1 backend (the SQL Server).
It is important install your printers automatically to all clients that logon to the domain.
This can be achieved via Group Policy. This can be set up easily in a Microsoft Windows 2008 Server R2:
Note: It is better to deploy printers via GPO preferences to end users and also for large-scale environments. There are third-party products eg. Tricerat or Printer Logic which makes centralizing printer queues and servers more efficiently.
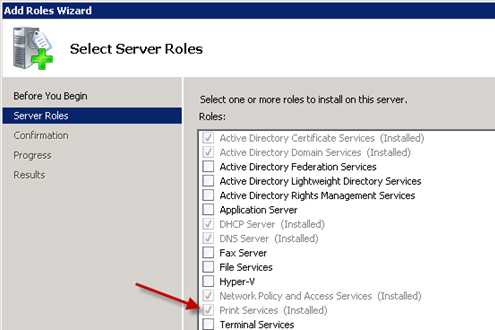
From Server Manager add the Print Services role
Install the Print Services roleFigure: Install the Print Services role* When the role has installed, open Print Management from Administrative Tools
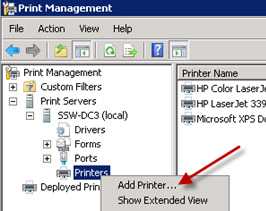
Install all your printers by right clicking on Printers and clicking Add Printer
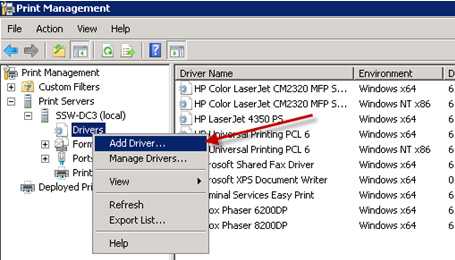
Add all of your printers to the serverFigure: Add all of your printers to the server* Right click on Drivers and choose Add Drivers. From here you will be able to install the x86 and x64 drivers for your printers so all workstations in your organization get the printer drives automatically
Add the additional drivers for both x86 and x64Figure: Add the additional drivers for both x86 and x64* Click on Printers in the menu to get a list of your installed printers
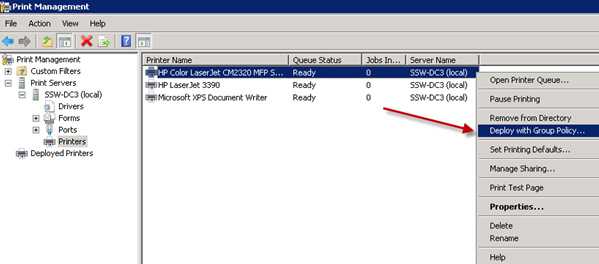
Right click on the first printer you want to install via group policy and click on Deploy with Group Policy
Deploying your printer with Group PolicyFigure: Deploying your printer with Group Policy* Next, you need to choose a Group Policy Object (GPO) to add the printers too. You may wish to create a new GPO specifically for the printers, which you can do through the Group Policy Management tool in Administrative Tools
Select the Group Policy Object (GPO) to add the printers toFigure: Select the Group Policy Object (GPO) to add the printers to* Repeat the last 2 steps for each printer you want to add automatically using Group Policy
Reboot your workstations and the new printers will be added upon login
It is important install your printers automatically to all clients that logon to the domain.
Windows Server has a built-in solution for auditing who accessed your files in a file share or non-shared files in your file system, but it is turned off by default.
"Advanced Audit Policy Configuration" is a Group Policy setting in Windows that enables several audit options for your files, e.g.:
Object Access - Audit who opened, closed or modified files and folders in your system
Logon/Logoff - Audit who's logged on and off the server
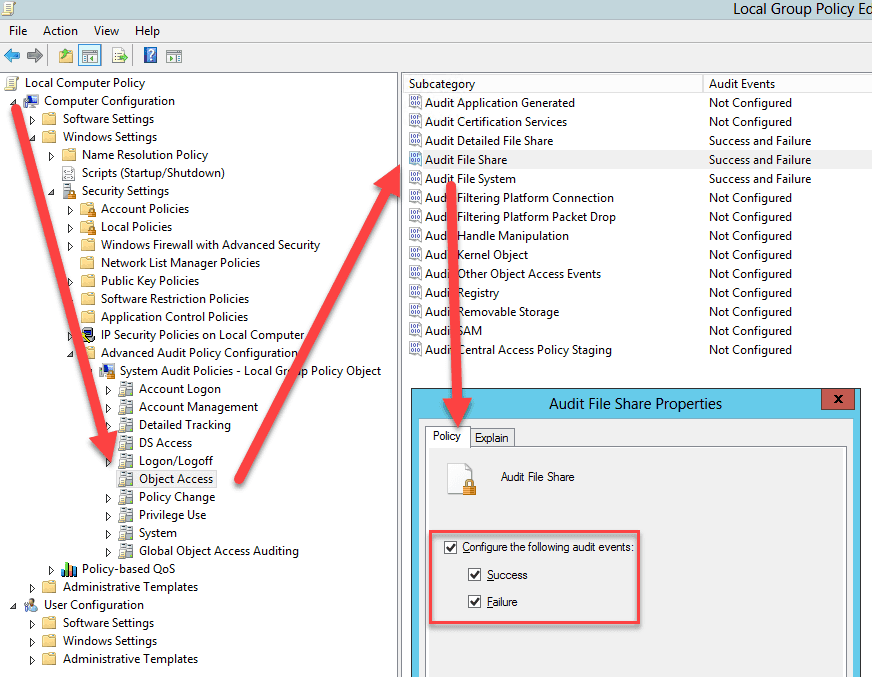
To get to this setting, you need to:
Open your domain's or server's Group Policy (or Local Group Policy)
Choose the setting that applies to you e.g. Object Access
Edit the subcategory | Check "Success" and "Failure" as best practices
Figure: Good Example - Auditing Successes and Failures in your file shares
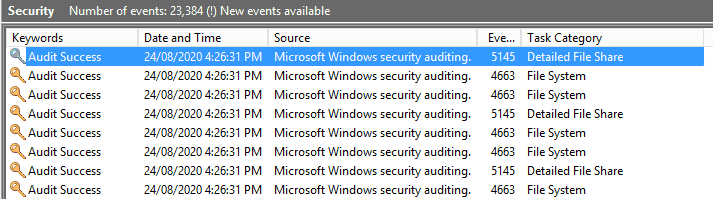
After that, your server will start logging audit events in the Event Viewer. To filter relevant events, do the following:
Open Window's Event Viewer | Windows Logs | Security
Click "Filter Current Log..." | IDs 4663, 4660, 5145:
4663 (An attempt was made to access an object) - Event ID when a user accesses a file system file
4660 (An object was deleted) - Event ID when a user deletes a file system file
5145 (A network share object was checked to see whether the client can be granted desired access.) - Event ID when a network user accesses a file share file
The relevant logs will start popping up:
Figure: Good example - Filtered logs with file access information
Click on each entry for a detailed explanation on which file was opened, which IP address was used and which user initiated the action
This kind of audit tool is an important part of any SysAdmin or Security Engineer to better see what is going on in your Windows environment.
Windows Server has a built-in solution for auditing who accessed your files in a file share or non-shared files in your file system, but it is turned off by default.
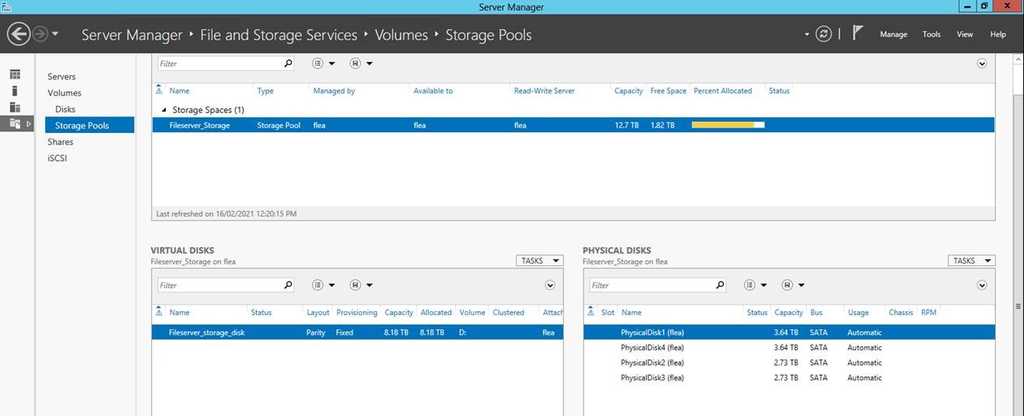
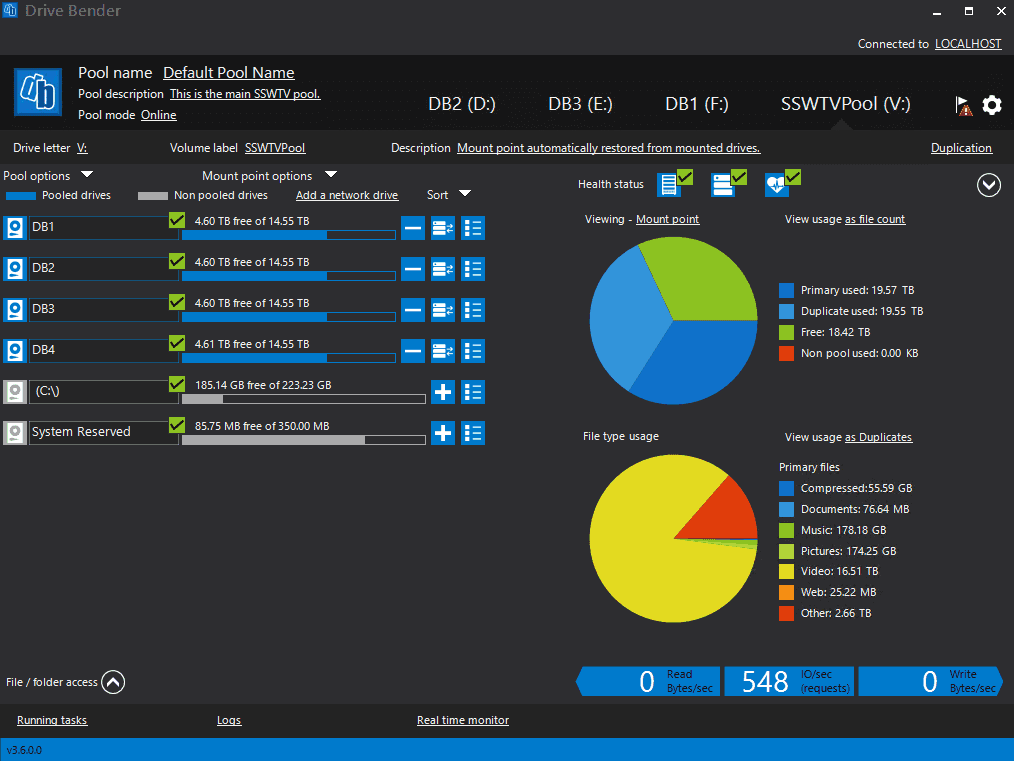
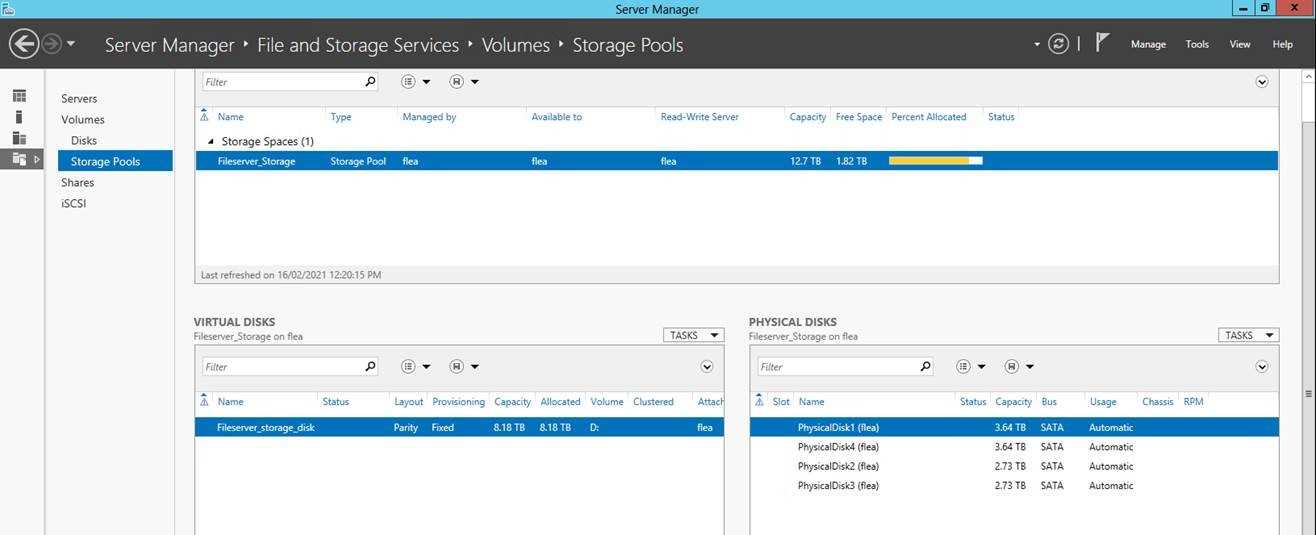
Windows has a built-in storage solution called Storage Spaces that allows you to group 3 or more storage drives to create a bigger pool; however, that technology, whilst useful, has some better third-party contenders like Drive Bender, which does the same thing better and faster.
With Drive Bender, you also have software RAID, disk grouping, and file duplication that you find in Storage Spaces, but with a better interface and faster transfer rates.
Drive Bender Pros
Nice UI with lots of functionality
Regular updates
Heaps of configuration options
Friendly (and fast!) customer support (Bonus: They are located in Sydney, Australia, just like SSW! 😃)
Easy add and remove of drives to the pool
Check your disk health automatically
Get notifications on pool status
Drive Bender Cons
Storage Spaces is "free" (built-in in Windows Server), Drive Bender is $54.95 for 3 machines (still cheap, forever)
Windows has a built-in storage solution called Storage Spaces that allows you to group 3 or more storage drives to create a bigger pool; however, that technology, whilst useful, has some better third-party contenders like Drive Bender, which does the same thing better and faster.