Rules to Better Designers - 10 Rules
Longing for remarkable design impact? Check SSW's User Interface & User Experience Design showcase and consulting page.
We live in a complicated world with too many distractions, where information overload is commonplace. “Less is more” is all about keeping things simple and achieving a design with the least number of elements required to deliver a message effectively.
Video: Less is more (5 min)Keep it simple
"Just because we can does not mean we should"
It is common to include design elements, features, or product enhancements solely because we think we should. This approach can unnecessarily complicate a design and overwhelm a user.
Applying "Less is more"
Thumbnail designs

Figure: Bad example - Overcrowded thumbnail design with too many elements 
Figure: Good example - Simpler thumbnail design with less visual elements By keeping things simple, we reduce complexity and avoid cognitive overload for our users. Making simple changes like using shorter, more descriptive language or minimising the overall number of design elements will make the overall message of a design much clearer to understand.
UI interface
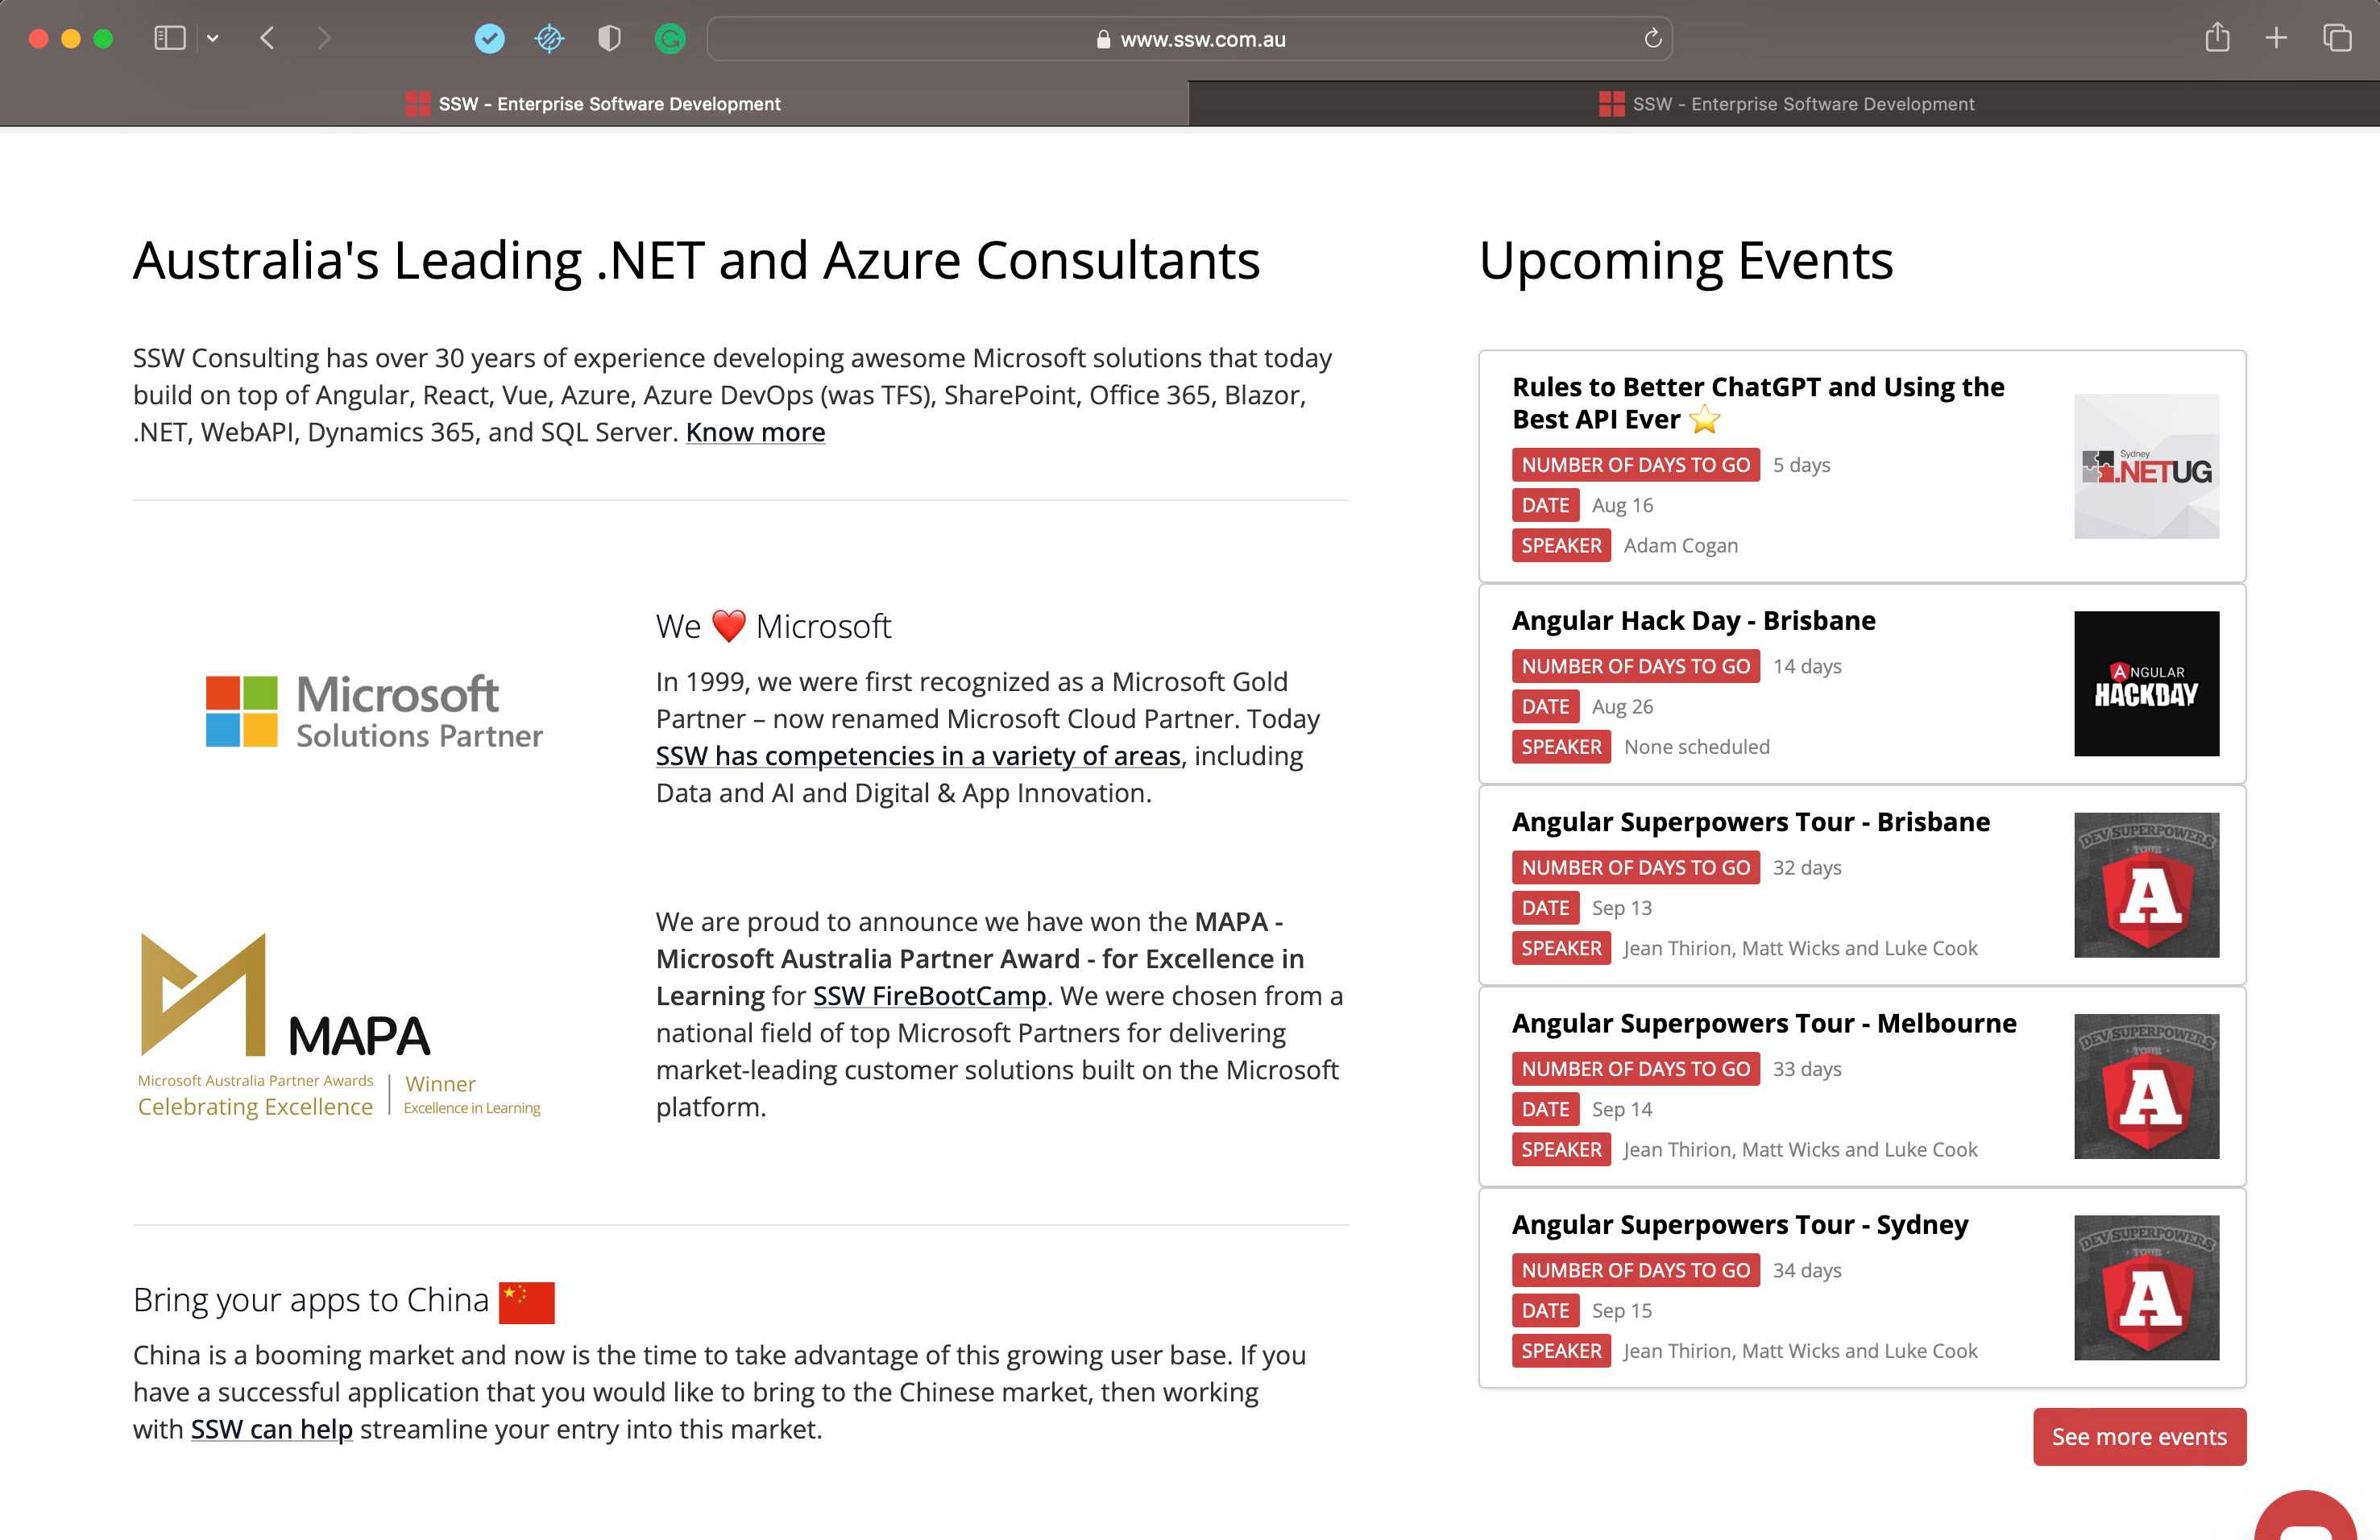
Figure: Bad example - Event cards have many rows and highlights 
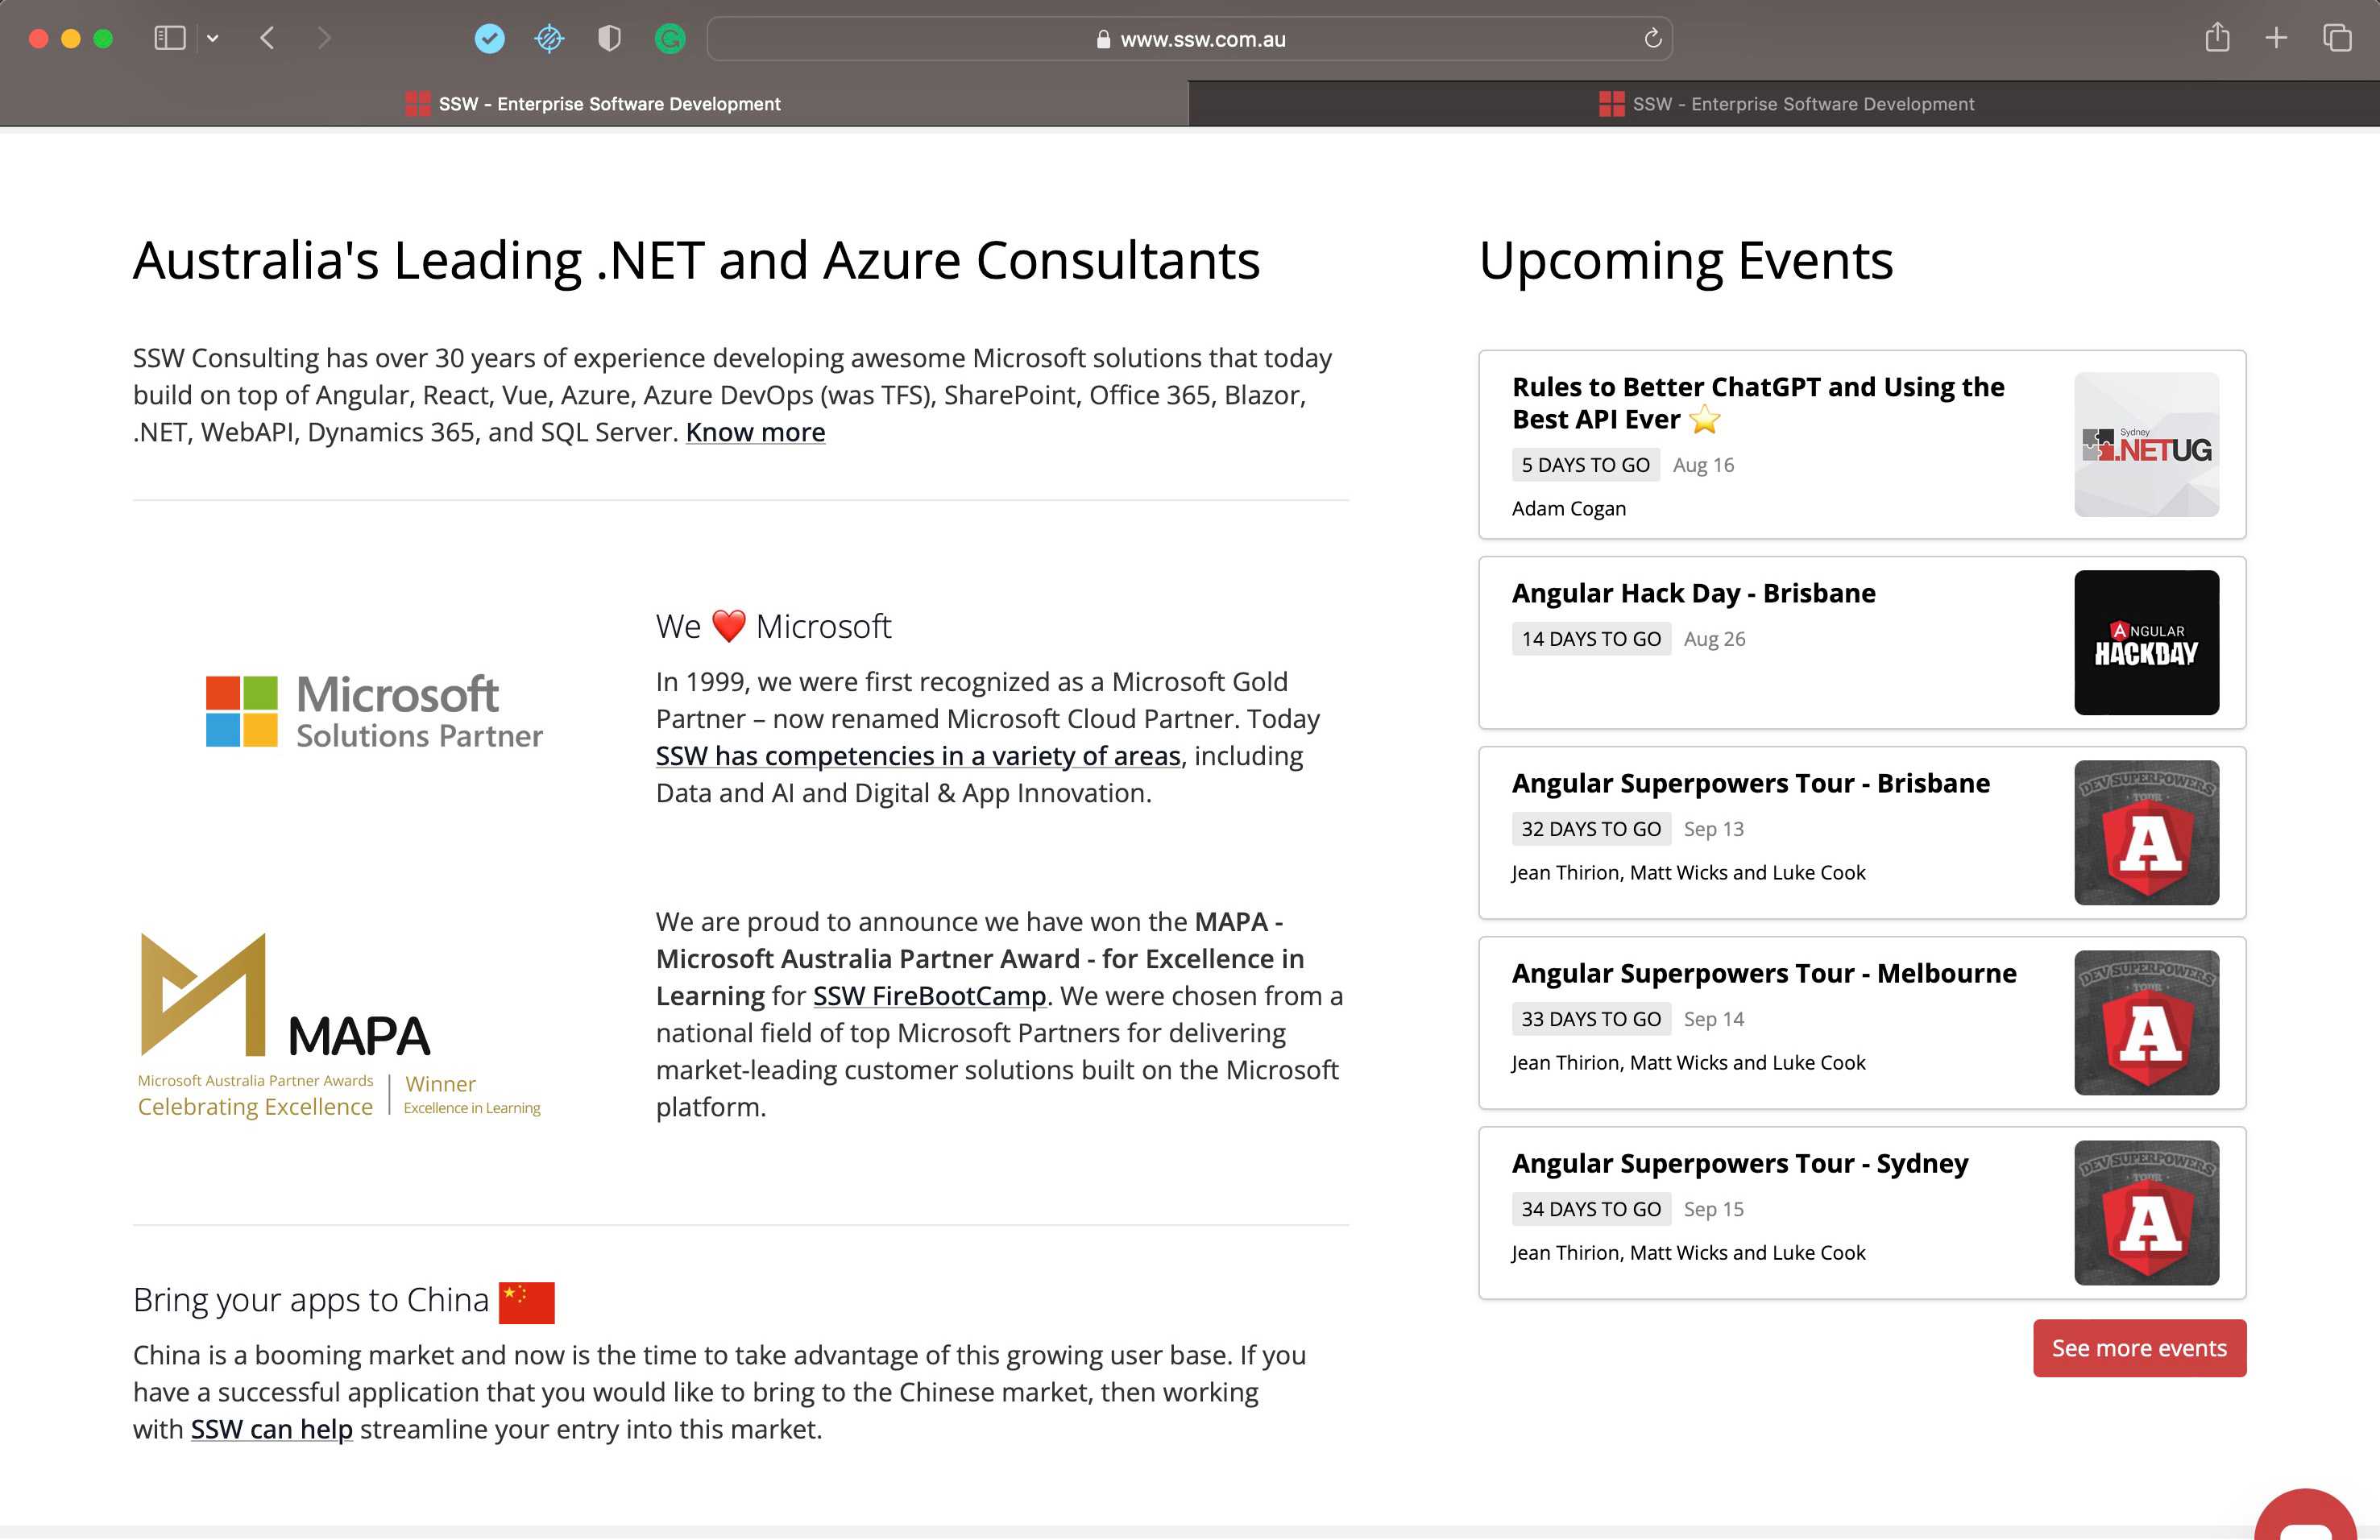
Figure: Good example - Event information have fewer highlights Stage background

Figure: Bad example - Presenter with graphically busy background 
Figure: Good example - Presenter with simple textured background Office layout
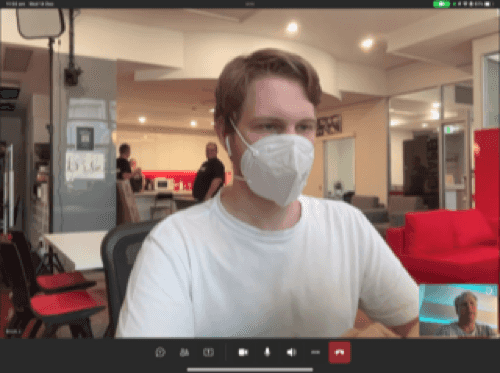
Figure: Bad example - cluttered office background 
Figure: Good example - neater office background So next time you think about designing something, try to keep it simple and remember... “less is more”.
Have you ever found yourself on a project and wondered if you require a UX designer? Especially one who can create interactive prototypes with tools like Figma?
If you are asking yourself that question, you probably need a UX designer. Here are 7 situations where you could benefit from a UX designer.
- Specification Reviews: A UX designer can help develop low fidelity non-interactive wireframes using Figma that can be verified with the client. This wireframe can be used to estimate project costs and will often become the starting point of a more elaborate interactive prototype.
- Application or Web Development: If you're building a new Product, Service, Website or Application, a UX designer can be invaluable. They can conduct user research, create user personas, design user flows and wireframes, and ensure that the end product provides a positive and intuitive user experience.
- Redesign or Improvement Projects: When you already have an existing product or service but want to enhance its user experience, a UX designer can assess the current design, identify pain points and areas for improvement, and propose design solutions to optimize the user experience.
- Usability Issues: If you're receiving feedback from users indicating usability issues or facing high bounce rates, a UX designer can conduct usability testing, analyze user behaviour, and recommend design modifications to address those issues.
- Complex Systems or Workflows: A UX designer can simplify the user interface, streamline the user journey, and make the overall experience more efficient and user-friendly, especially when considering complex applications or online services.
- User Research and Analysis: To gain a deeper understanding of your target audience, their needs, and preferences, a UX designer can conduct user research, interviews, and surveys to gather insights that inform the design process.
- Accessibility and Inclusive Design: A UX designer can help ensure your product or service is accessible to people with disabilities by incorporating inclusive design principles and following accessibility guidelines.
Remember, the specific need for a UX designer may vary depending on the nature of your project, but their primary goal is to create meaningful and enjoyable experiences for the user.
There are a few options when it comes to the best software for UI/UX design (the creation of mockups and prototypes in particular). The most popular are:
- V0.dev (recommended)
- Figma (recommended)
- Adobe XD
- Sketch (MacOS only)
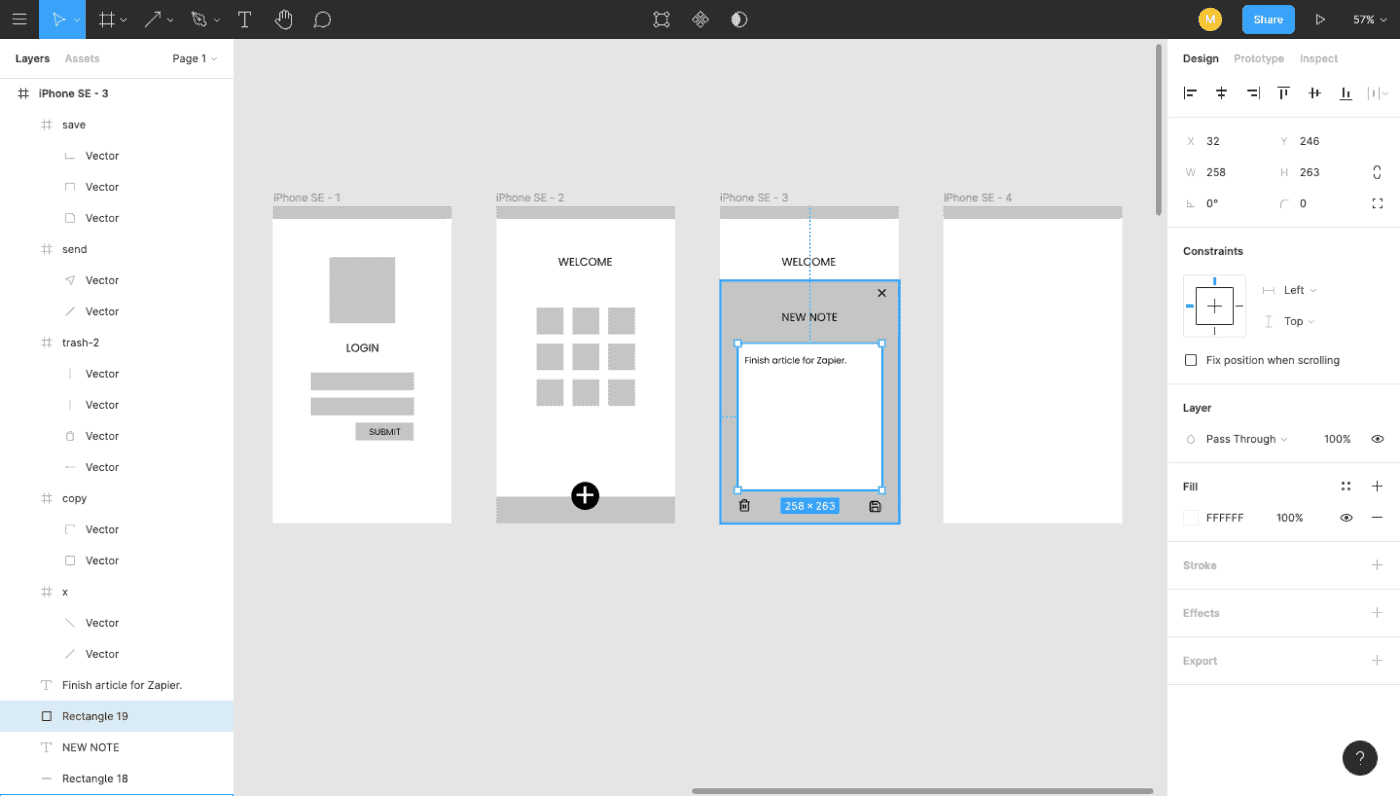
The goal of any designer is to develop the best UI and develop the best user experience possible, and you want the best tool to help achieve this. Figma is the ideal design tool - highly collaborative, accessible cross-platform, and cloud-based. In addition to these features it comes with a huge suite of unique design tools. The auto-layout feature, for example, helps designers craft highly responsive products in a way that reflects actual CSS properties like grids and flexbox which serves to ease the transition between design and development.
Figure: Figma helps designers bring ideas to life in a wireframe or prototype.
Why Figma?
- No need for installation or updates (browser-based)
- Unlimited view-only collaborators on every project
- Unlimited version history with version control (30-day history for free users)
- Unlimited files and cloud storage
- Auto-save
- Collaboration and handover is streamlined with a shared workspace and exportable assets
- Libraries of reusable components, text, colour and layer styles
- FigJam is a built-in whiteboard tool for mapping and discovery
- A huge and highly engaged community
Note: One tool doesn't always replace the others! Figma does not include the print design and photo editing features of Adobe Photoshop and other software also used by designers. Photoshop is the industry standard in raster (pixel-based) graphics editing, photography and digital art. Adobe Illustrator, on the other hand, is the standard vector-based design tool used for print design, logos, icons and more. All of these tools have a place on a designer's belt!
Note: Some people might use the term storyboarding when they are actually talking about mockups or prototypes. For information on storyboarding, check The Storyboarding Rule
Mockups and prototypes are both design artifacts used in the software development process, but they serve different purposes and have different levels of fidelity. Many user requirements can be best encapsulated in visual mockups/prototypes.
A design mockup is typically created early in the design process to provide a rough visual overview of the user interface. They are static and do not include interactive elements or functionalities.
Mockups can become interactive and functional representation, also know as design prototype over time. They are more advanced and closer to the final product, allowing for user testing, feedback, and iteration.
There are 3 types of mockup or prototype, use depends on the specific goals and the stage of the project:
- Low-fidelity Mockups (aka Wireframes)
- High-fidelity Mockups
- Interactive Prototypes
Often it's best to start with a low-fidelity mockup to get across a concept or rough storyboard. Then complete a high-fidelity mockup to communicate the look and feel, and if time permits create an interactive prototype.
Low-fidelity Mockups
Creating a low-fidelity design mockup can be achieved through various methods including wireframes, paper prototypes, and other similar techniques. It can be valuable to have the Product Owner on call when creating a low-fidelity mockup to get immediate feedback and direction.
Start by identifying the key features and functionality that the product should have. This will help you focus your efforts and ensure that your mockup accurately represents your intended product.
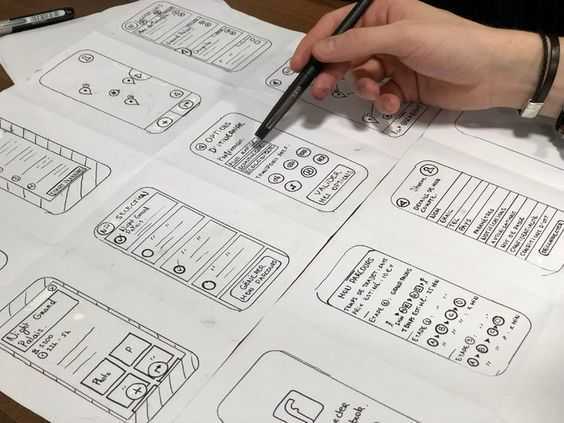
Figure: Good Example - A hand-drawn mockup. Nice and quick for early concept design Then create a basic wireframe of your design. A wireframe is a visual representation of the layout and structure of your website or app. You can create digital wireframes using tools like Figma, Adobe XD, or Sketch. Alternatively, you can use paper and pencil to sketch out a rough wireframe by hand. Add details to your wireframe by adding boxes and labels for different features and elements (e.g. buttons, input fields, and images).
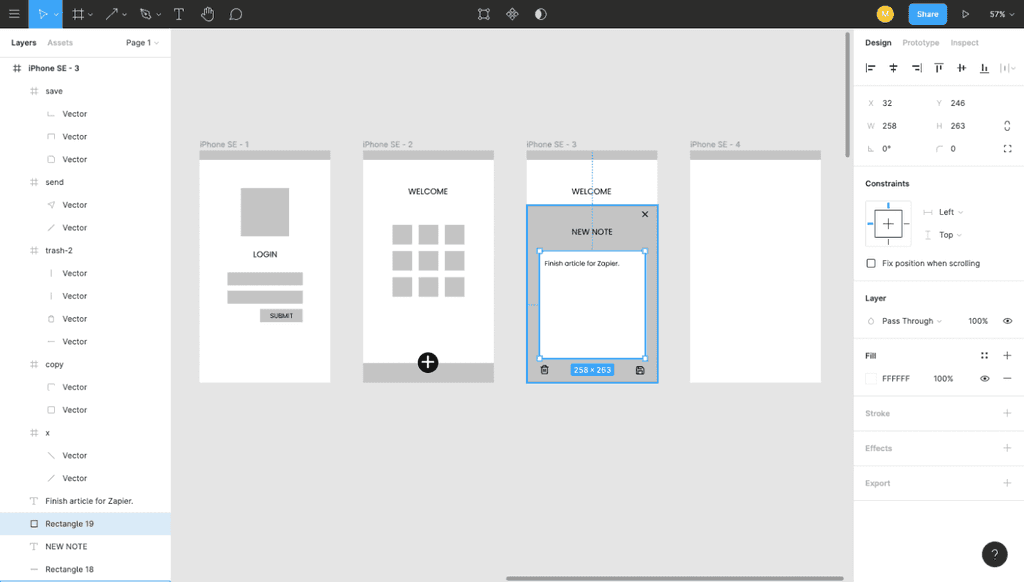
Figure: Good example – Example of wireframes (created in Figma) Once your low-fidelity design mockup has been approved, you can use it as a reference point for creating a high-fidelity mockup.
High-fidelity Mockups
A high-fidelity mockup is a more detailed version of a design that includes visual design elements such as typography, colors, and images. It is created using specialized design tools and takes more time to create than a low-fidelity mockup.
Warning: Don't go down the track of giving a customer a few concepts (on some projects we gave 2 or 3 completely different concepts by different designers). This leads to too much mixing and matching when they see them.
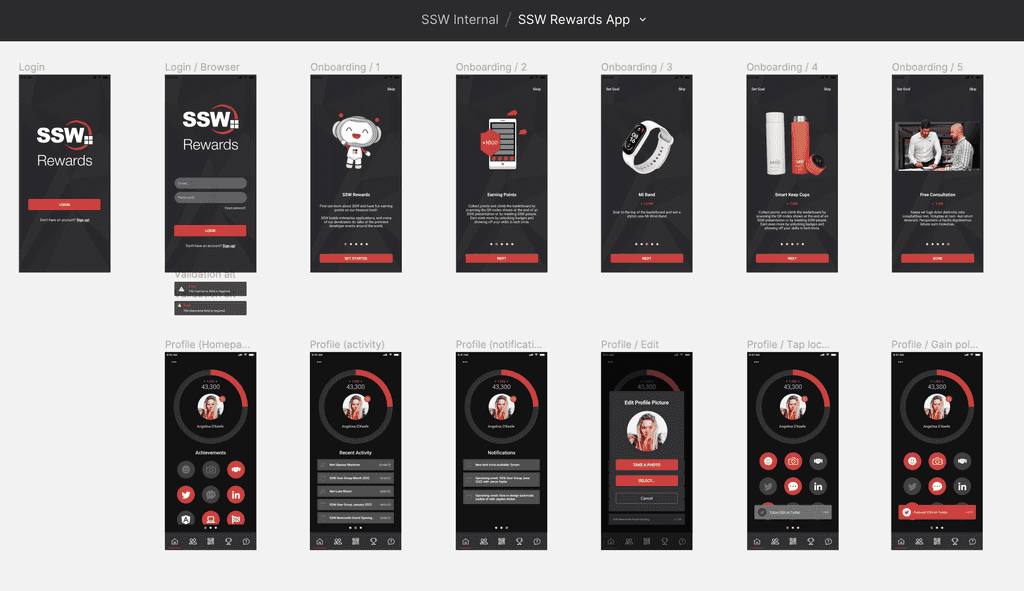
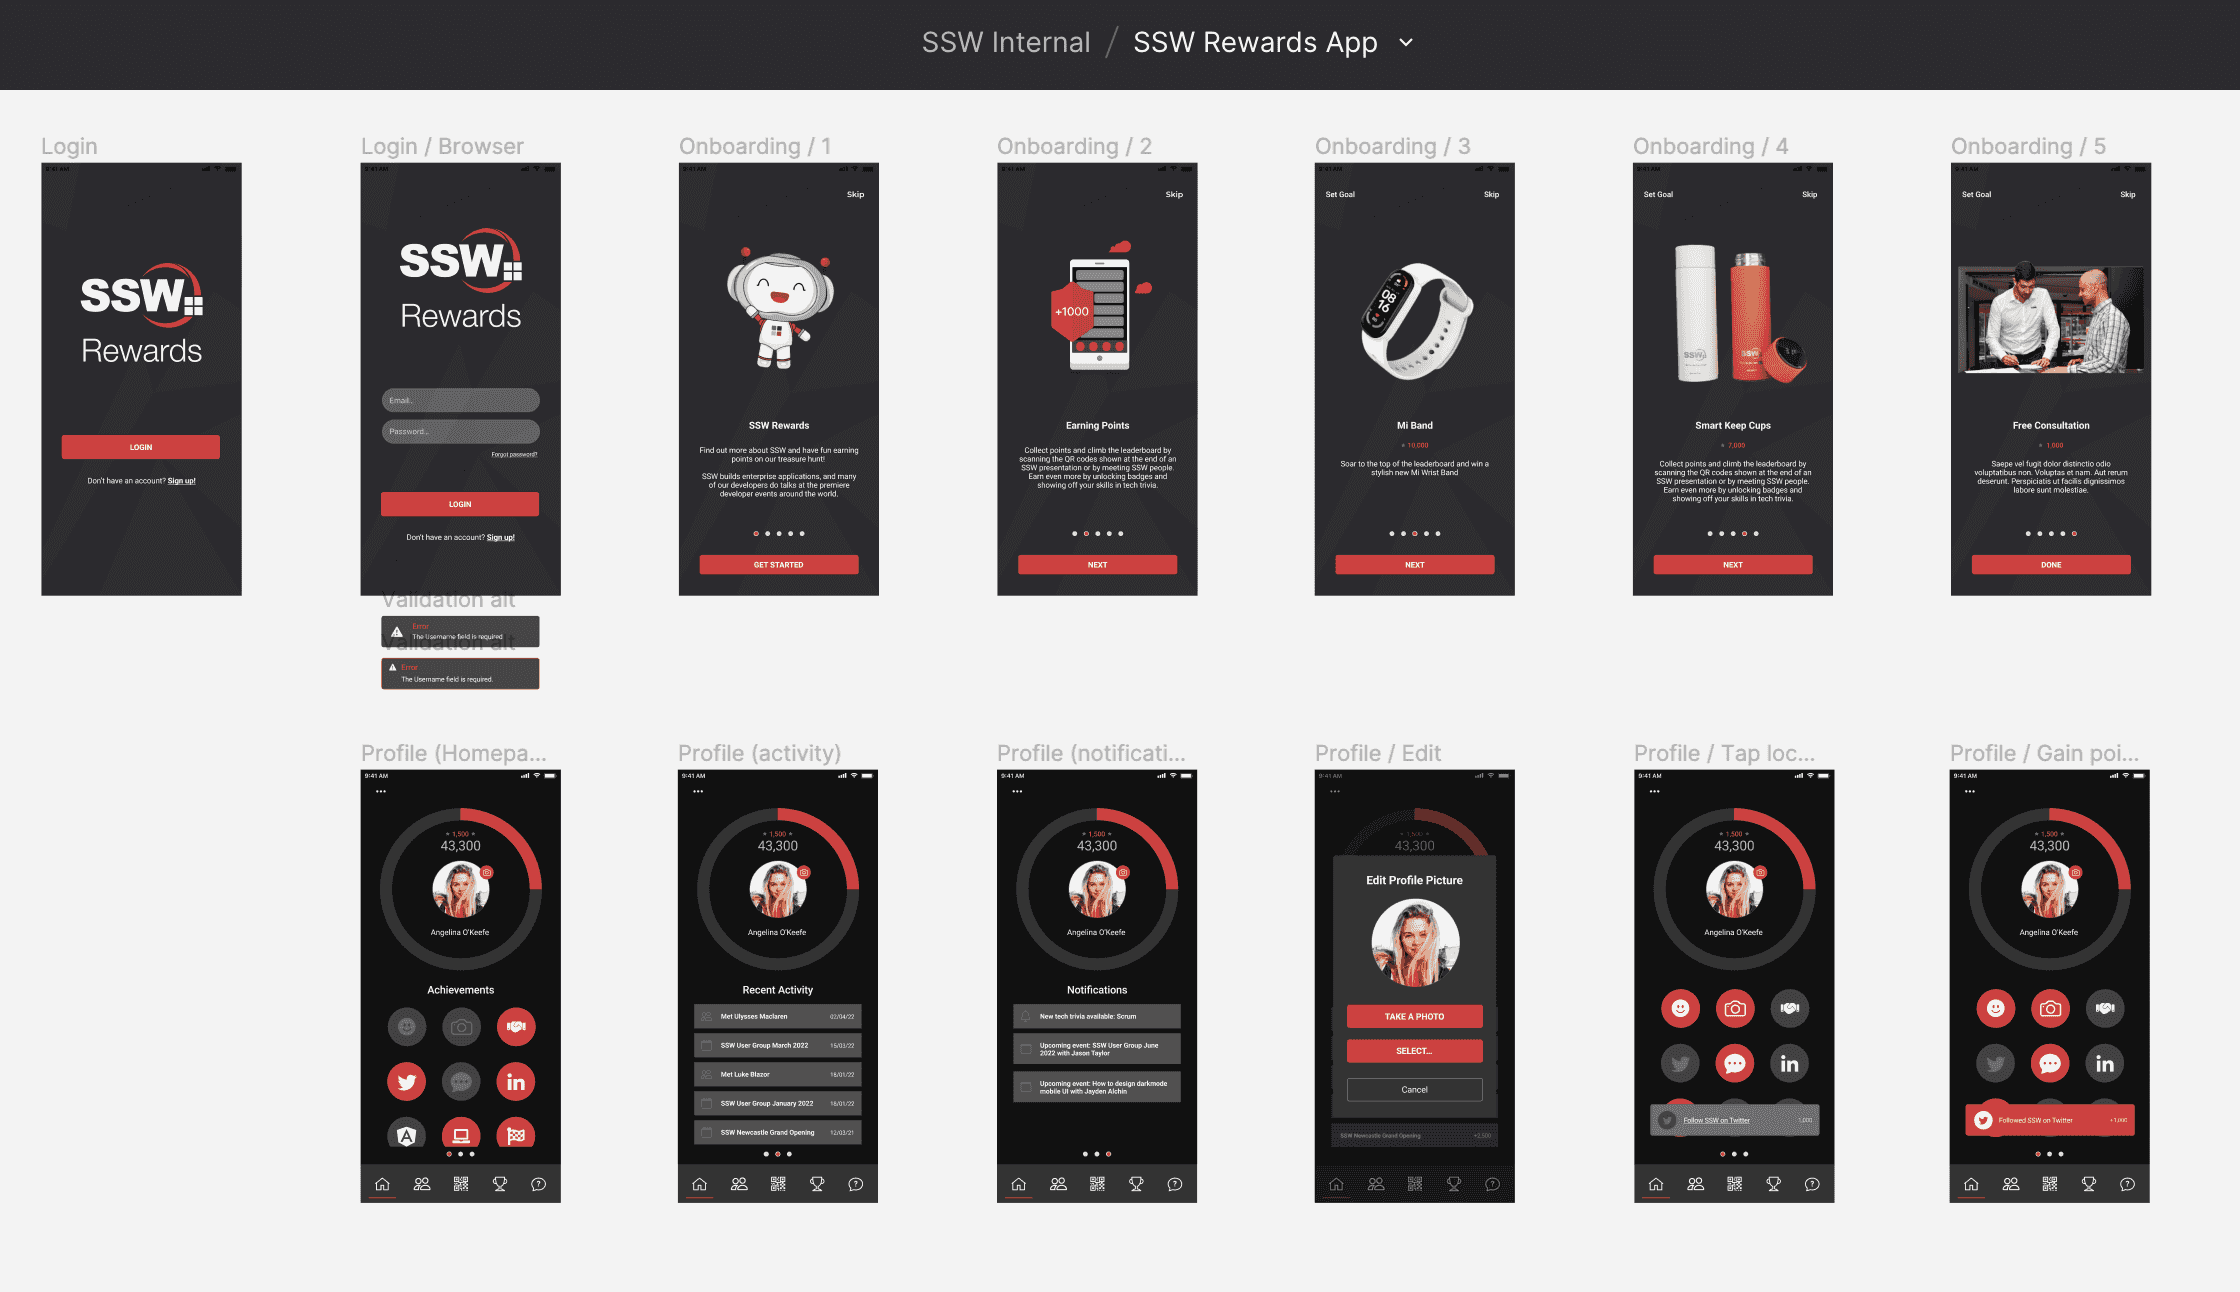
Figure: Good example – High fidelity mockup for SSW Rewards App - recommended as quick to update when changes are requested Use a design tool such as Figma to create high-fidelity mockups of a website or app's interface. This should include more consideration of UX and detailed UI elements such as buttons, forms, icons, and typography.
Incorporate branding: It's important to incorporate the brand's visual identity into the design of a product! This should include the brand's given color scheme, typography, and logo at a minimum.
Interactive Prototypes
To make a mockup more realistic and accurate to the end product, add interactivity to it. This includes consideration of how different elements will respond to user input, such as on-hover effects or the styling of visited links.
What are the best tools?
- Figma (Recommended)
- Sketch (Mac Only and for UX designers)
- Moqups (HTML5 based App)
- Balsamiq
- UXPin (more sophisticated, helps you create responsive designs)
Tips
Here are some more hot tips on using mockups for specification analysis:
- It is best to have a designer, developer, and customer work together
- Mock-ups should follow interface rules
- Get the mockups physically initialed, especially if you are performing a fixed-price contract. Yes, paperless is great - but not in this case
- If you can't get mockups initialed, then page by page approval over email is the 2nd best option
- Write the related business rules at the bottom of each screen - to be turned into unit tests
One of the many reasons Figma is the most recommended software for user experience design is that it makes the design process (handover and feedback) more open and inclusive. By enabling more people to contribute and share feedback, teams can create more creative and comprehensive solutions that reflect a wider range of perspectives.
Sharing a Figma file is as easy as sharing a link.
Figma is a multifaceted tool that provides designers with a shared project space where they can publish their work and allow the entire team to collaborate on a project. Editors can manage permissions and should invite viewers or collaborators to a project as needed. Interactive prototypes are treated as a separate file and can be shared using their own specific links too.
Share design work with collaborators
Developers, clients, or any other collaborators can use Figma to view mockups with selectable elements and interactive prototypes. The inspect tab allows viewers to access size or spacing measurements plus code snippets generated from the designs - for iOS, Android, and CSS - that can be copied right into a project. Developers can also take advantage of a project's components and styles to dive into all the reusable elements or variables that have been created. Anyone with access to a Figma file can easily export not only whole frames, but any symbols and assets a designer has crafted or included in the file.
Video: Figma For Beginners: Prepare for Handoff (5 min) - Figma helps developers deliver on the promise of a design
Get feedback for your design work
Team members can easily add and reply to comments on files and prototypes using the browser or Figma desktop and even on Figma mobile app. Figma also allows you to pin your comment to a selected location on the canvas. You can also mention collaborators in your messages.

Figure: Good example - Feedback pinned to a location, mentioned a designer and using change from X to Y rule When you've reached an agreement or solved an issue, remember to resolve the comment. Figma will remove the comment icon from the prototype to keep your canvas clean and tidy.
Note: Resolved comments can be turned back on by showing resolved comments on the prototype.
Design files should never be stored in Azure DevOps (was VSTS/TFS) or any other development file system.
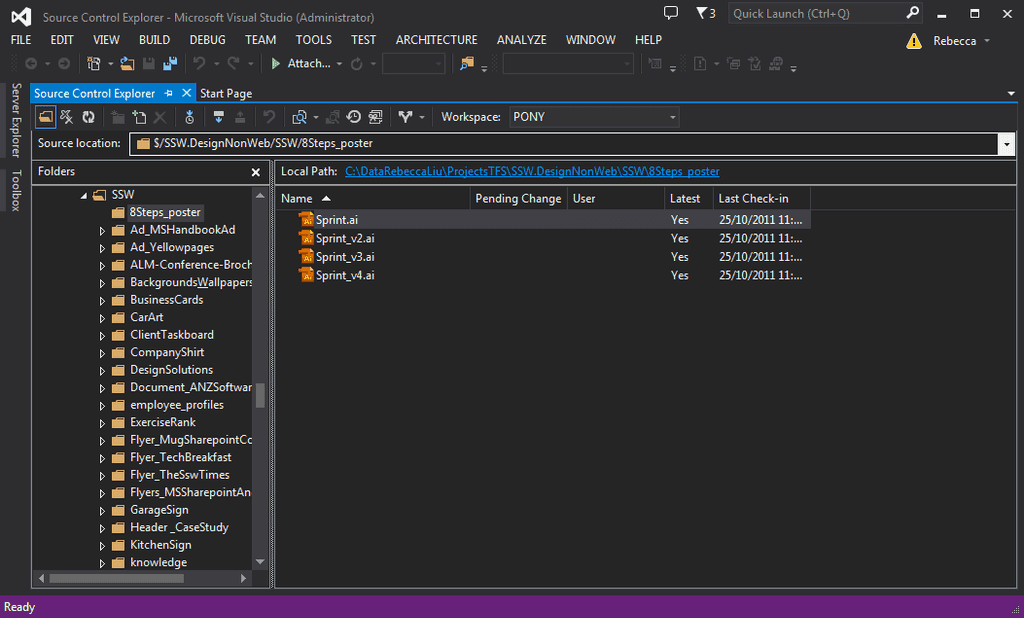
Figure: Bad example – Azure DevOps (was VSTS/TFS) takes too long to set up and too slow to use 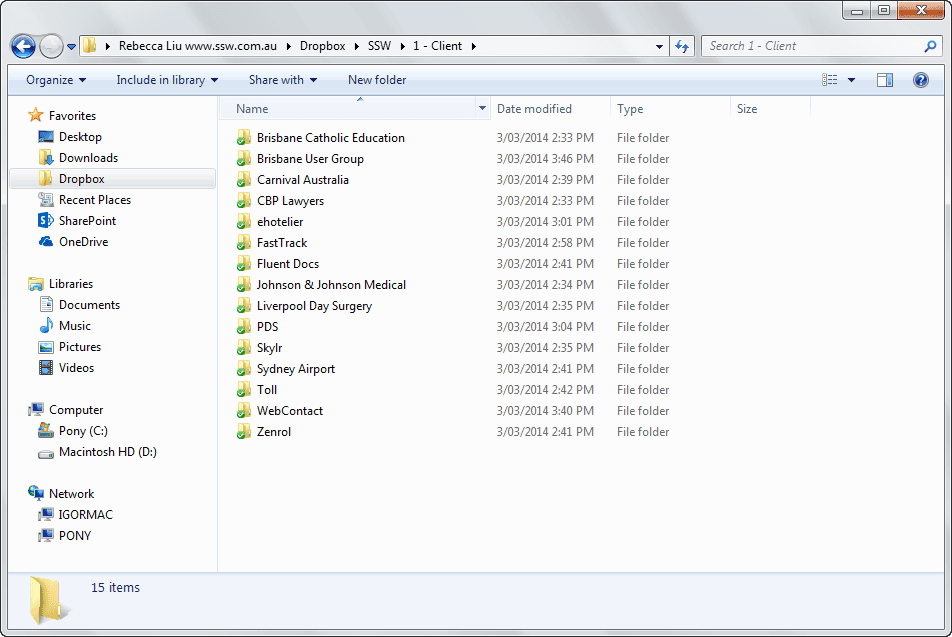
Figure: Good Example – Dropbox or OneDrive 
Figure: Good Example – OneDrive and Teams Google Drive and Dropbox don’t work in China, so SSW prefers to use OneDrive.
For developers, see Do you know where to keep your files?
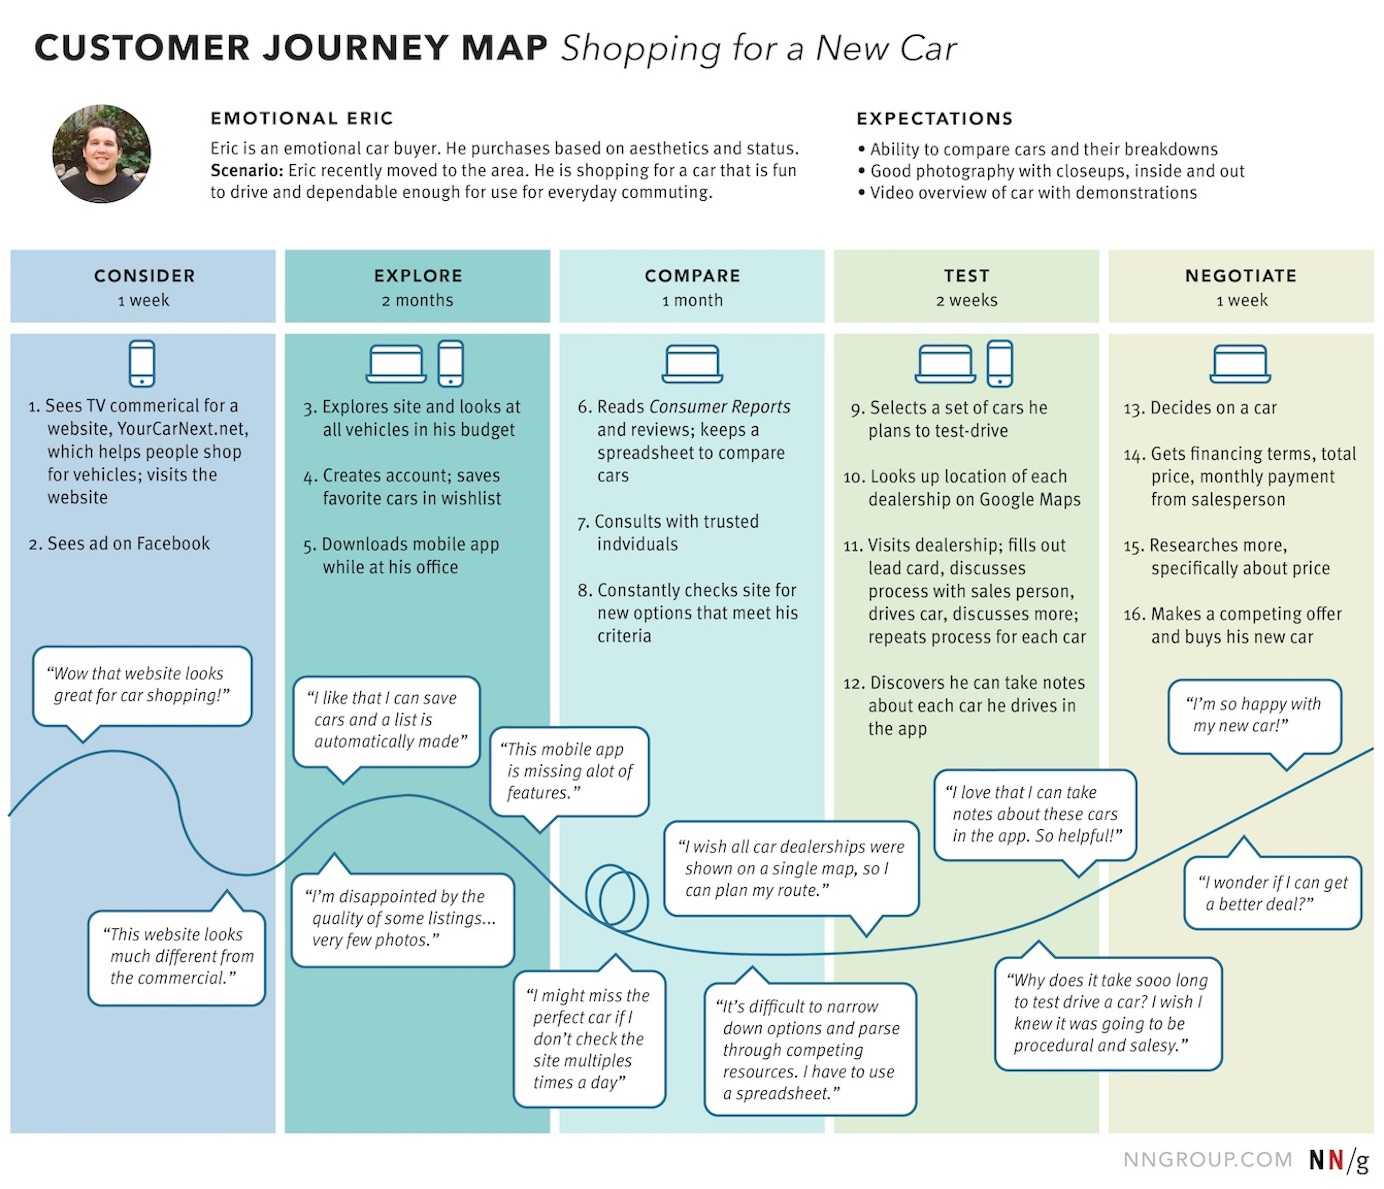
A User Journey Map (aka Customer Journey) is a visual aid that allows the clear communication of user needs.
Video: What is User Journey Mapping? (7 min)These artifacts should be used at the beginning of a project during the early stages of research and design. This allows user requirements to properly inform design decisions made during development, and can help teams build a strong common understanding of a project. Capturing feedback in a Journey Map during or even after development, can provide high value as well. Pain points discovered in this way can reveal opportunities or areas for immediate improvement.
What is a User Journey Map
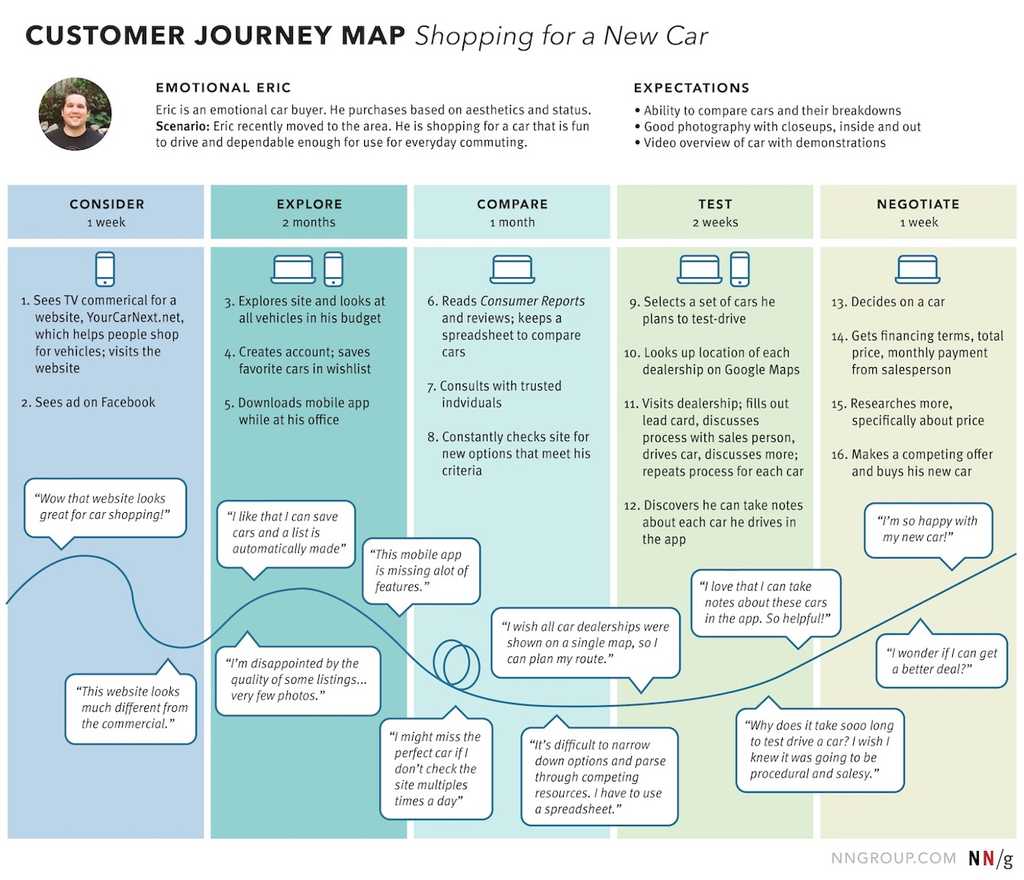
Figure: Observe the user's experience and pain User Journey Maps are used to understand how a customer interacts with your product or services. There are many ways of presenting this information. Take a look at Smaply's example Journey Maps.
The key things captured in a User Journey Map are what steps/stages the customer goes through and also some indication of user sentiment at the time. Often the user journey will be mapped out and then research done to gauge user sentiment at each point in the journey.
This can be done using wireframes or mockups rather than going through the entire build of the software. This way any potential pain-points for users can be identified and improved before going through the costly exercise of developing software.
They are also used in follow up research to identify problems in existing software and systems. This is especially true in sales processes, where it is very easy to identify where user drop off occurs.
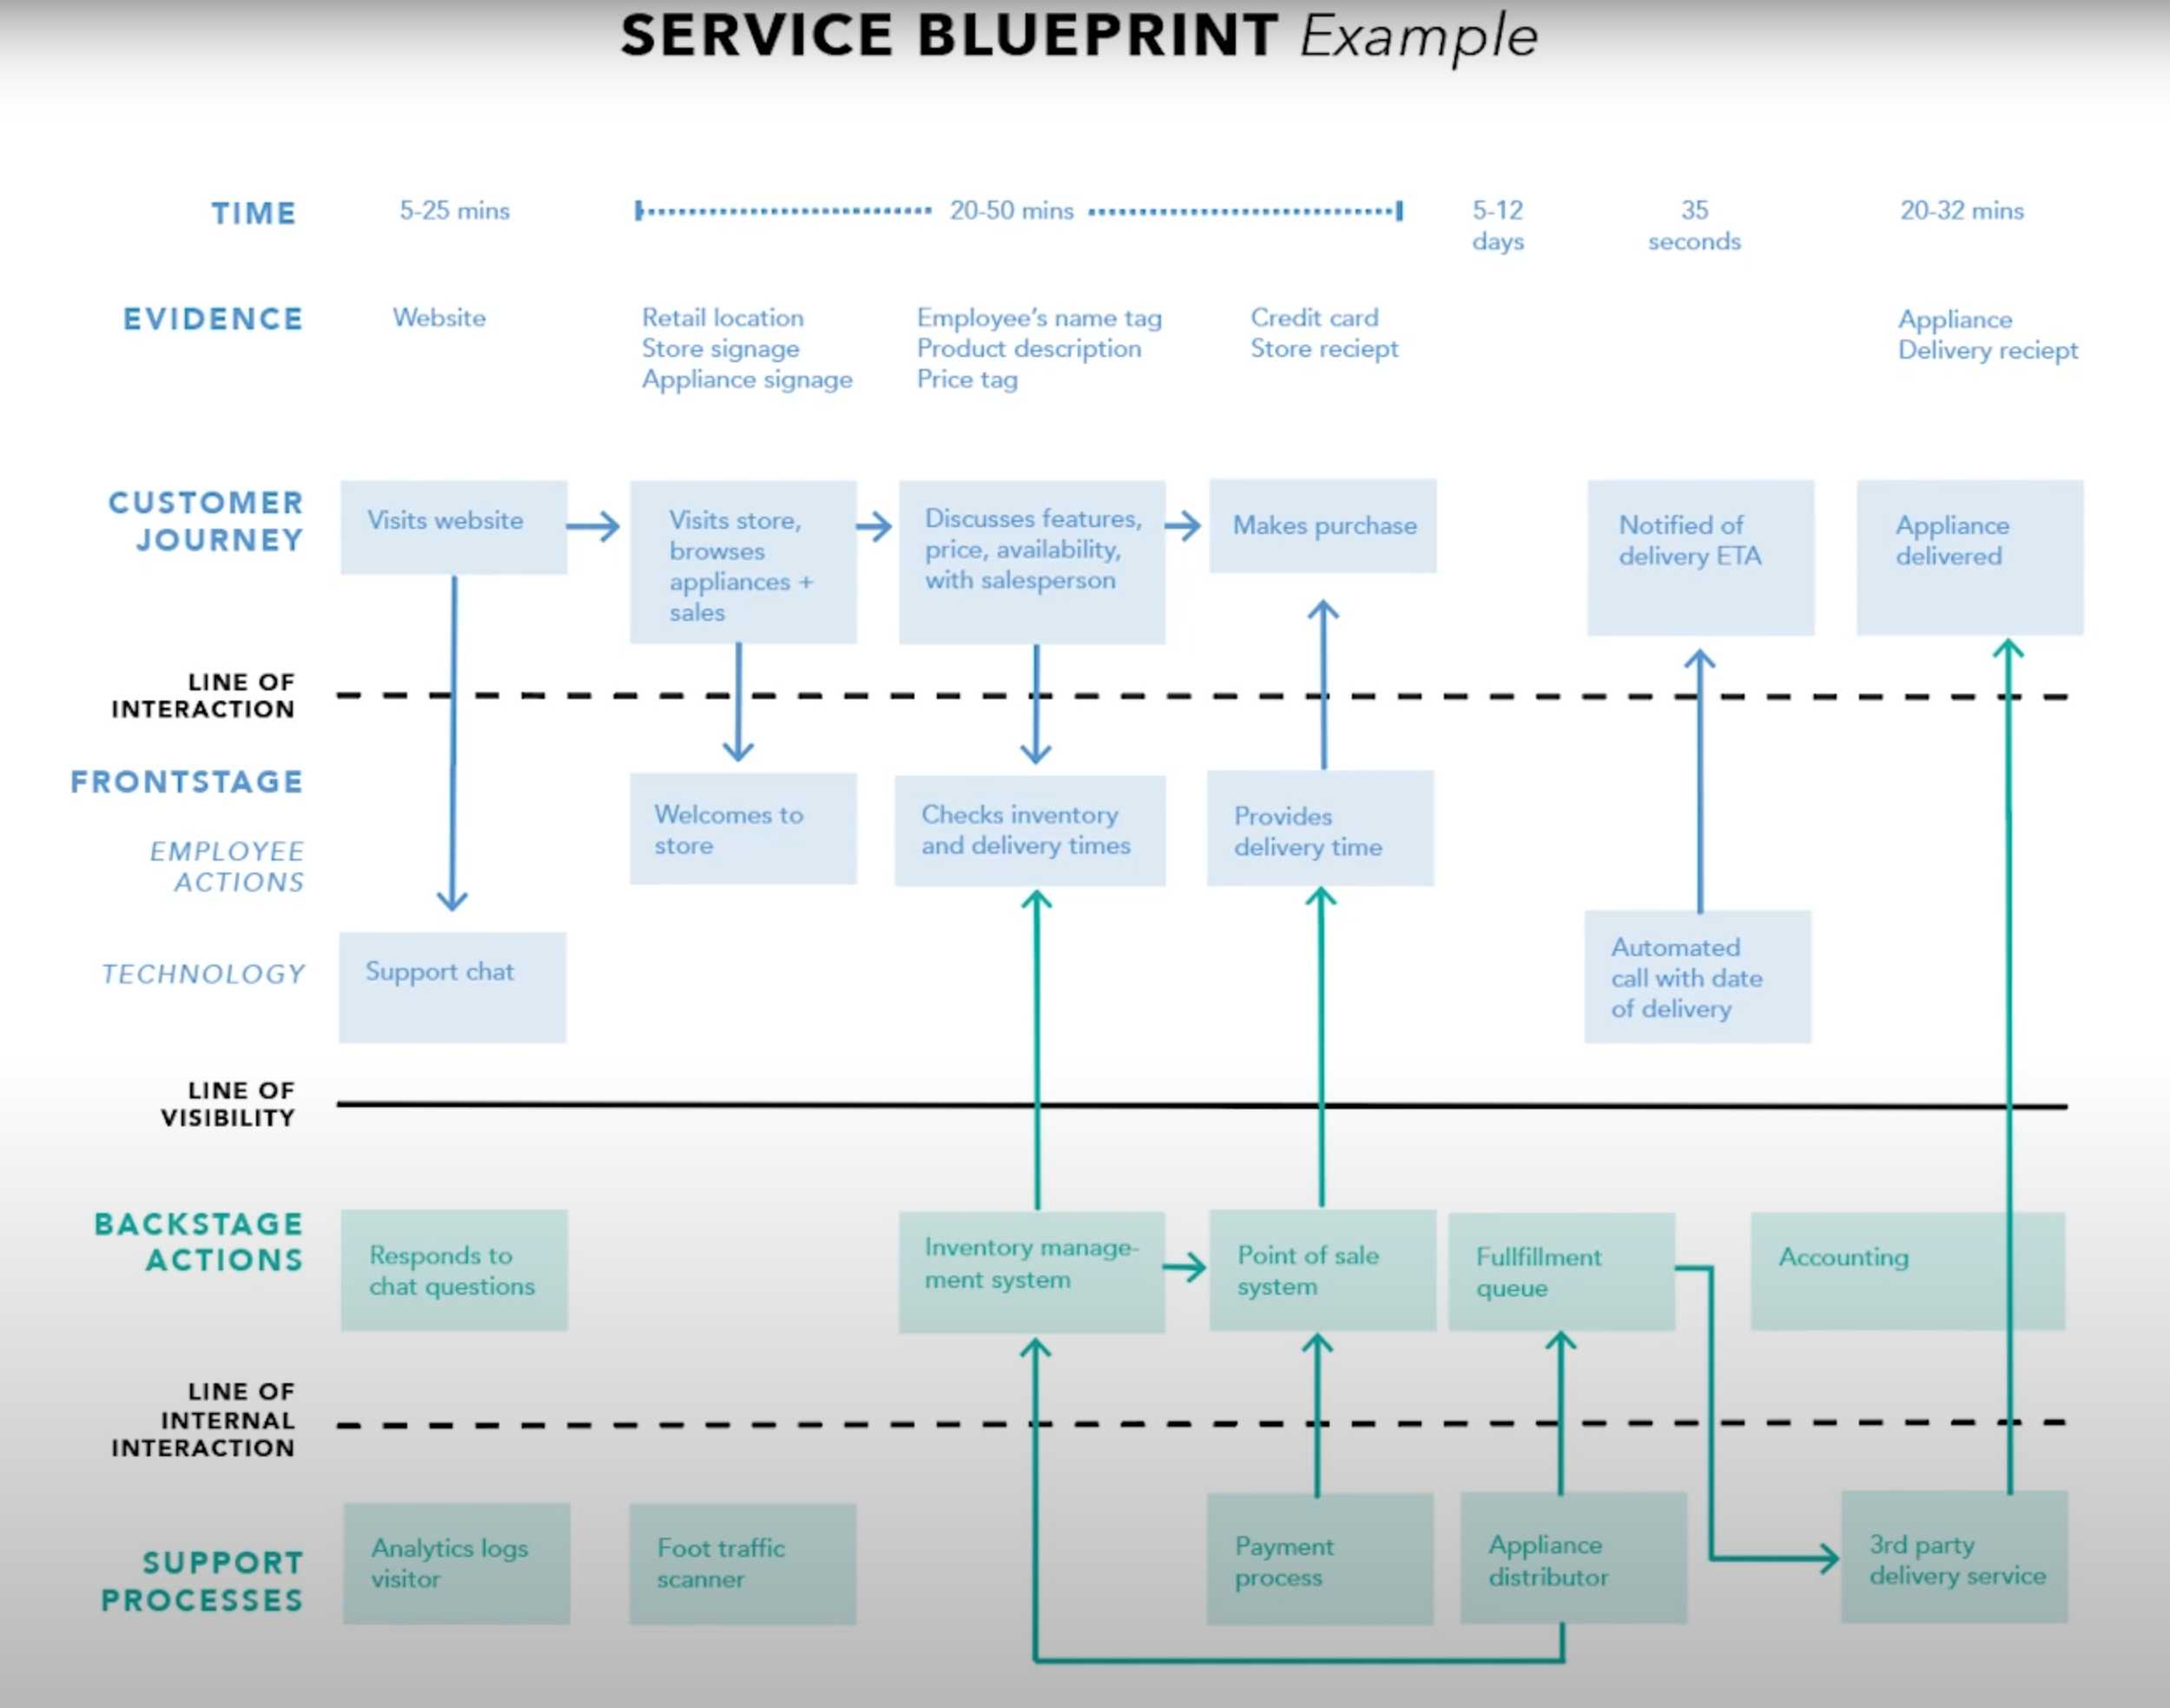
Service Blueprints
Sometimes the coding starts too early and, on some projects, the Product Owner needs more help to visualize what's being proposed. A great way to get in sync is to use Service Blueprints.
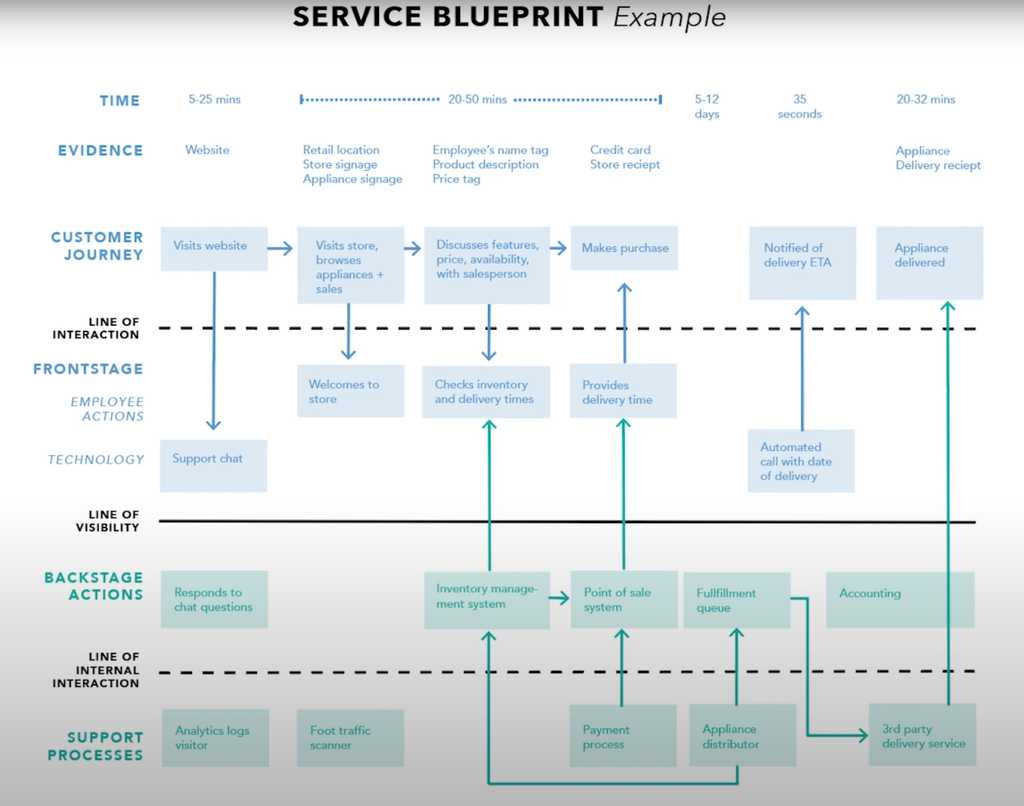
Figure: See all the flows through the application A Service Blueprint is a more detailed and process oriented document. This covers the steps from the User Journey Map and clearly details where and how the user journey will interact with the system being built. It also captures the various processes required inside the software. Often it will allow almost all API interactions to be captured, making it much easier for the developers to understand exactly what the various parts of the system are intended to do and what the user might be doing when they are called.
When to use them
Both these types of diagrams provide excellent documentation that is easily digestible, even by non technical people. They are especially valuable to verify with the Product Owner and to help the team understand the product vision. Because the Product Owner can easily understand what is happening, they can provide much better feedback than if they were simply provided UI wireframes or traditional documentation.
The team should produce these artifacts, typically not the Product Owner - this ensures what was in the Product Owner's head has made it to the team.
User journey mapping tools
It is very important to have your Word, PowerPoint, PDFs, and design documents up-to-date. You should also make it easy for anyone to identify which version they are looking at. The most effective way to achieve this is by placing the version number on the right-hand side of the footer.
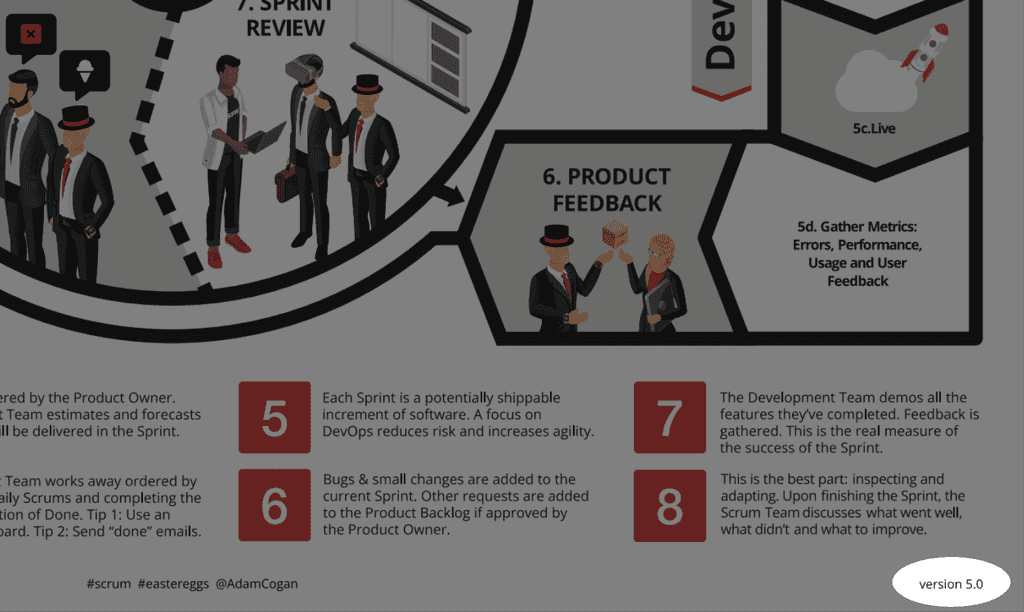
Figure: Good example - Version number on the RHS of a design document See how you increase the version number:
- Major 1.0 - Rarely change - only with major upgrades. E.g. Complete redesign
- Minor 1.1 - New features / release (customer facing) E.g. Add/remove a heading or a section
- Revision 1.11 - Emergency maintenance, spelling fixes
Add major version numbers in internal file names
For internal use, it is also good practice to include the major version number in the name of the files. This helps navigating through the old and the new versions, and makes it easy to roll back any changes and use an older version. For public files you should not include version numbers.
Warning: This should only be changed on major versions and only on internal documents.
codeauditor\file.pdf codeauditor\new\file.pdf codeauditor\file_latest.pdf
Figure: Bad example - Internal file names do not show any version information
codeauditor\filev1.pdf codeauditor\filev2.pdf codeauditor\file_v3.pdf
Figure: Good example - Internal file names show the version information
Adobe Photoshop’s AI-powered and prompt-based generative tool can turn a simple picture into anything you imagine.
Video: Generative Fill for Beginners (4 min)Generative Fill is easy to use
- Select an object or area with any selection tool (lasso, marquee, magic wand, etc)
- Enter a prompt into the contextual taskbar that appears after your selection
- Click generate!
- Use the arrows in the taskbar to see some alternate variations, or press generate again until you see a result you like.
Tips and tricks
- Leave the prompt blank and Generative Fill will use the area surrounding your selection to mask it away. Removing unwanted objects is that easy.
- Be intentional with the size and shape of the selections you make. The tool will use this as extra information to interpret your prompts.
- Generative Fill will create a new generative layer with the same name as your prompt. You can come back and alter the generated content at any time by selecting that layer.
Although there are still discussions around AI images and copyright, Generative Fill is powered by Adobe Firefly and designed for commercial use.
Canva is an intuitive online tool for creating images and crafty digital designs and is particularly effective for designing engaging social media memes.
While Canva is a valuable design tool, it may not be suitable for every design requirement. It is essential to complement Canva with advanced design tools and occasionally integrate AI image generators for a comprehensive design approach.
Don't use Canva for complex designs
For intricate and complex designs requiring advanced editing or branding designers, professional software like Figma, Adobe Photoshop, or Illustrator is more appropriate.
Do not use AI-generated images for social media content, as the current quality is difficult to match professional style.
Note: This may be updated as AI imaging technology evolves.
Figure: Bad example - Using Canva for a complex design Use Canva for simple memes on social media
Canva is great for creating memes due to its vast library of images, icons, and easy-to-use text overlay features. When crafting memes for social media, Canva’s templates can be a quick and effective starting point.

Figure: Good example - Canva to create simple memes